# Writing JS Objects
The JavaScript editor in low-code allows you to create reusable JavaScript functions that you can call within components to implement corresponding functionalities. In low-code projects, JavaScript can be used everywhere.
# How to Create a JS Object
A JS object is an entity composed of multiple functions and variables. It is a reusable component that can be referenced in other JS objects, allowing you to create an organized hierarchical structure.
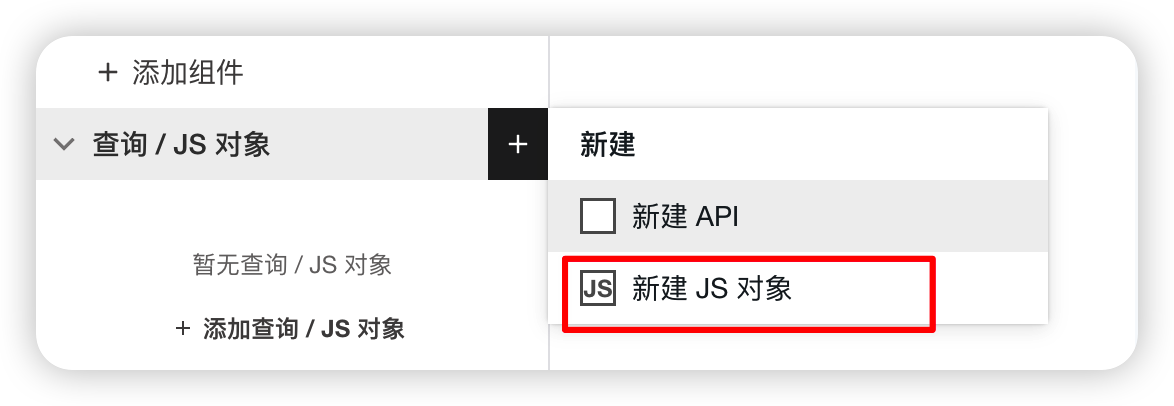
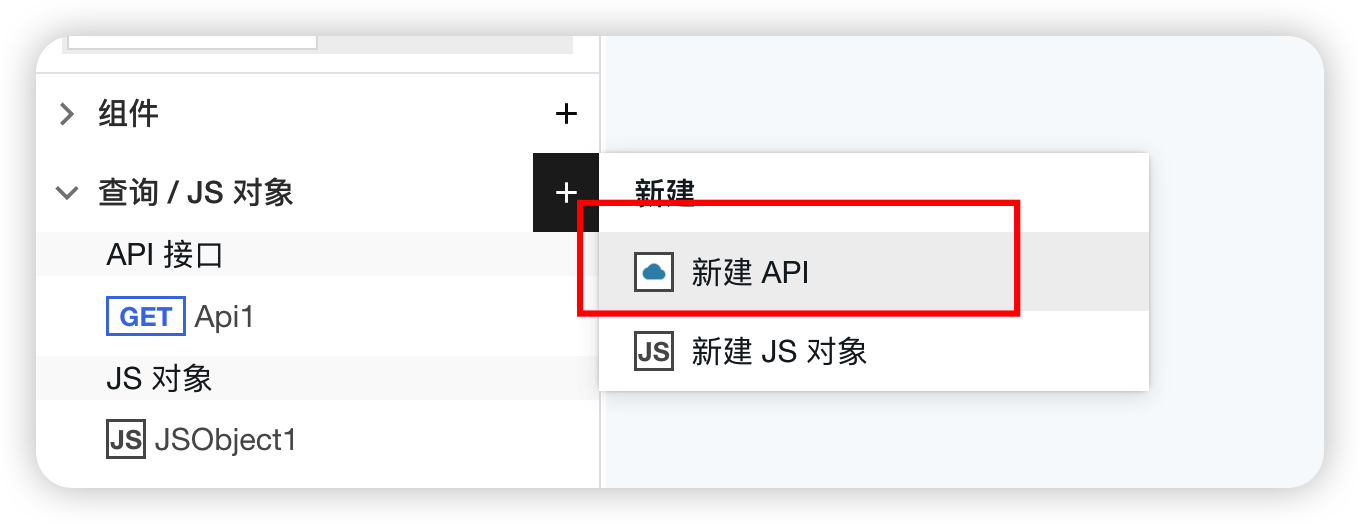
You can add a new JS object from the 【Queries/JS】 section in the left menu bar.
# How to Call a JS Object
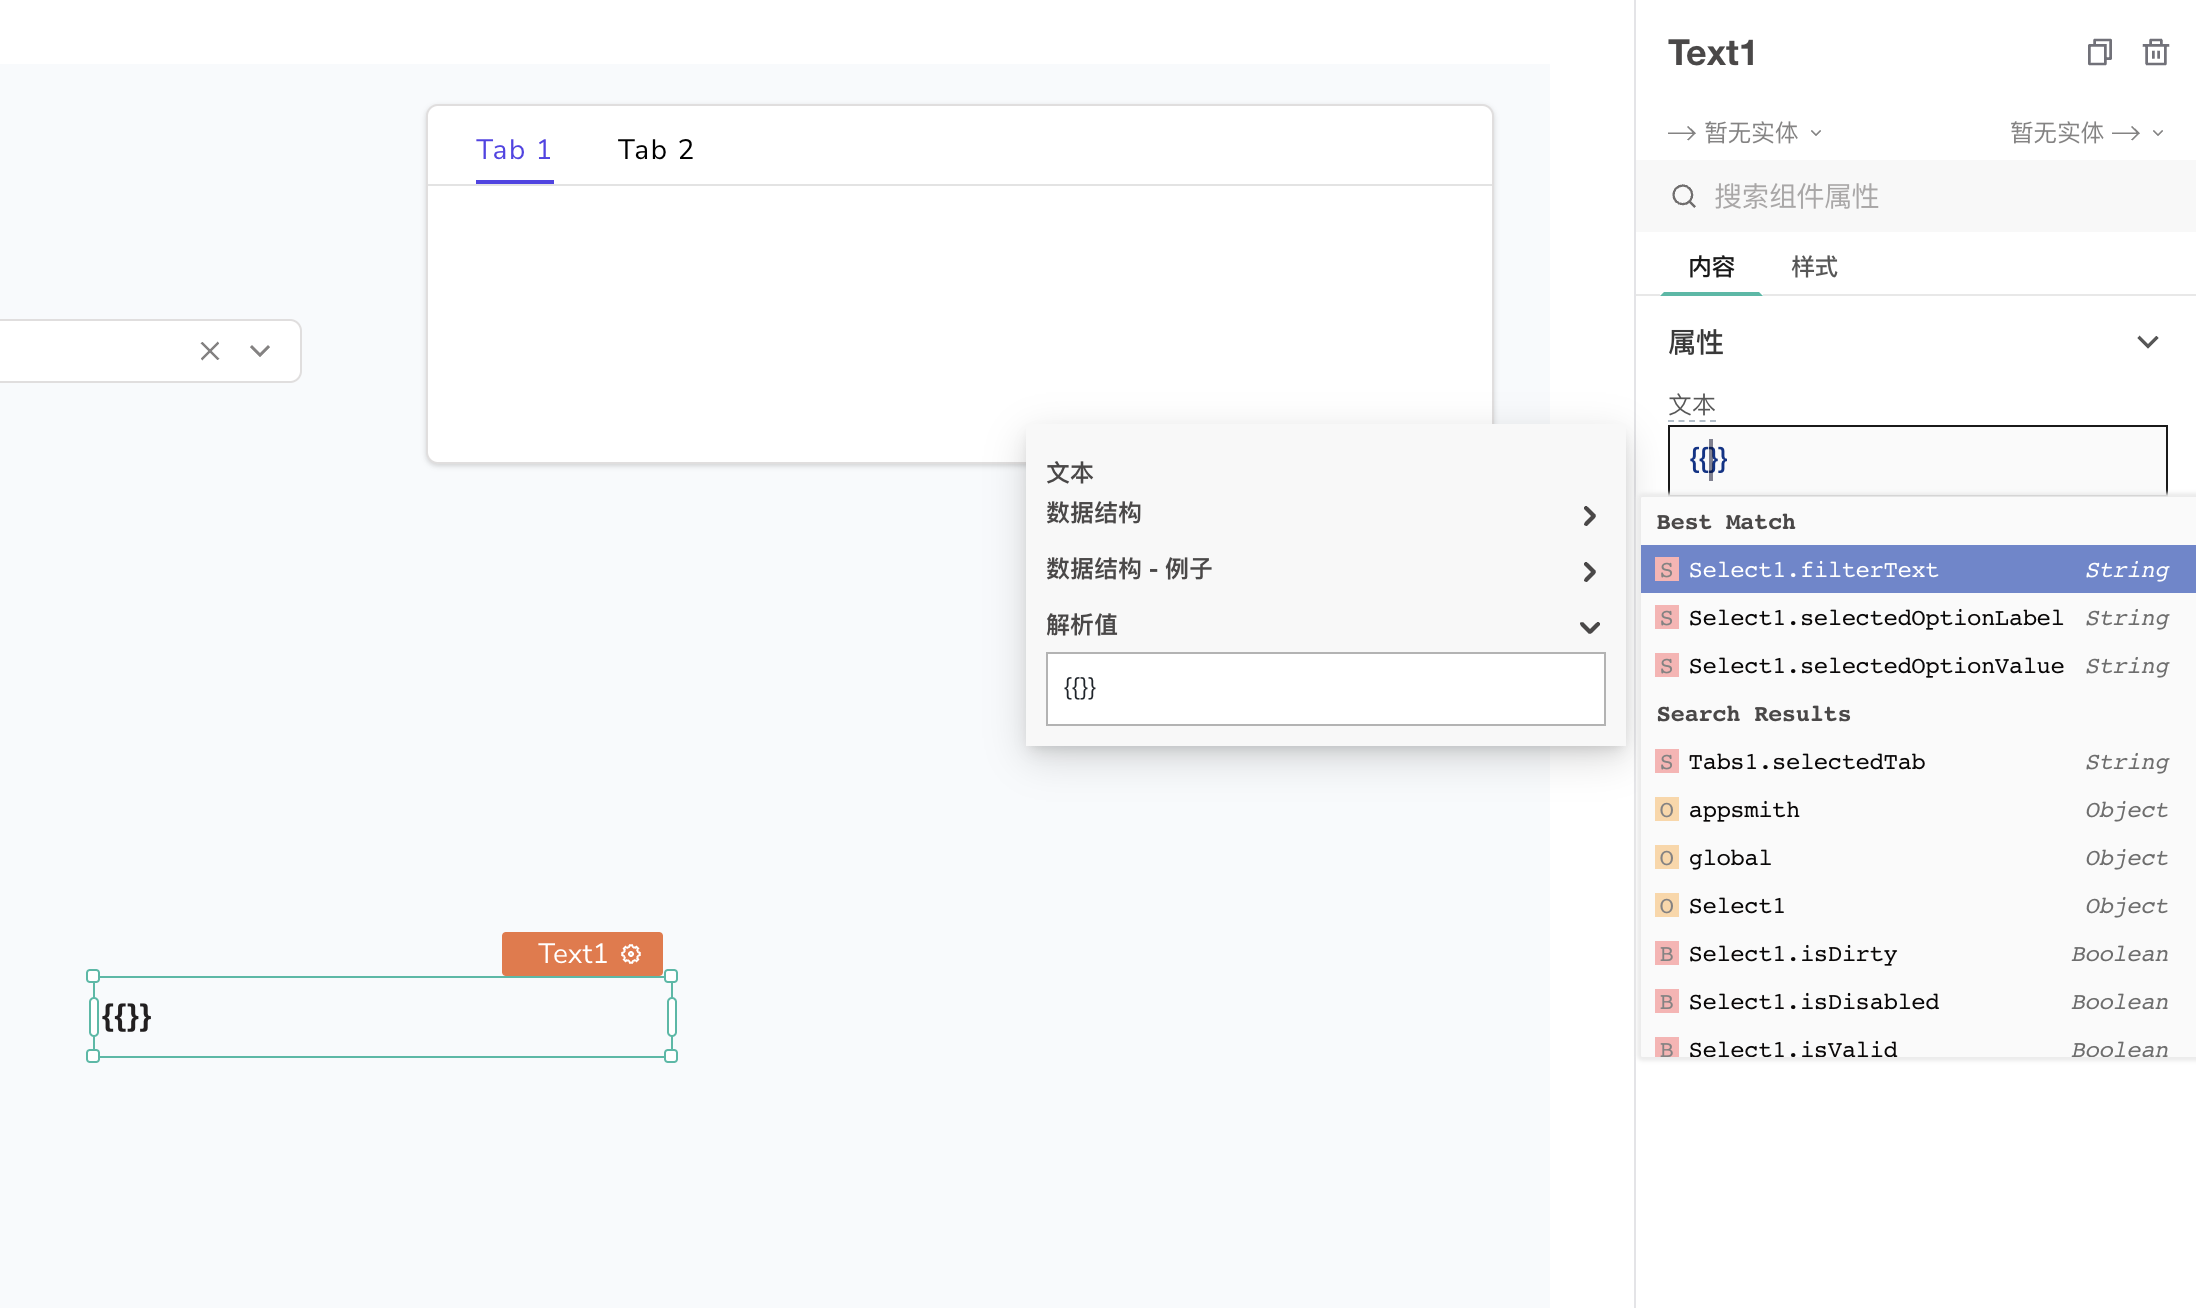
You can call functions defined in JS objects within any input box in PagePlug, for example:
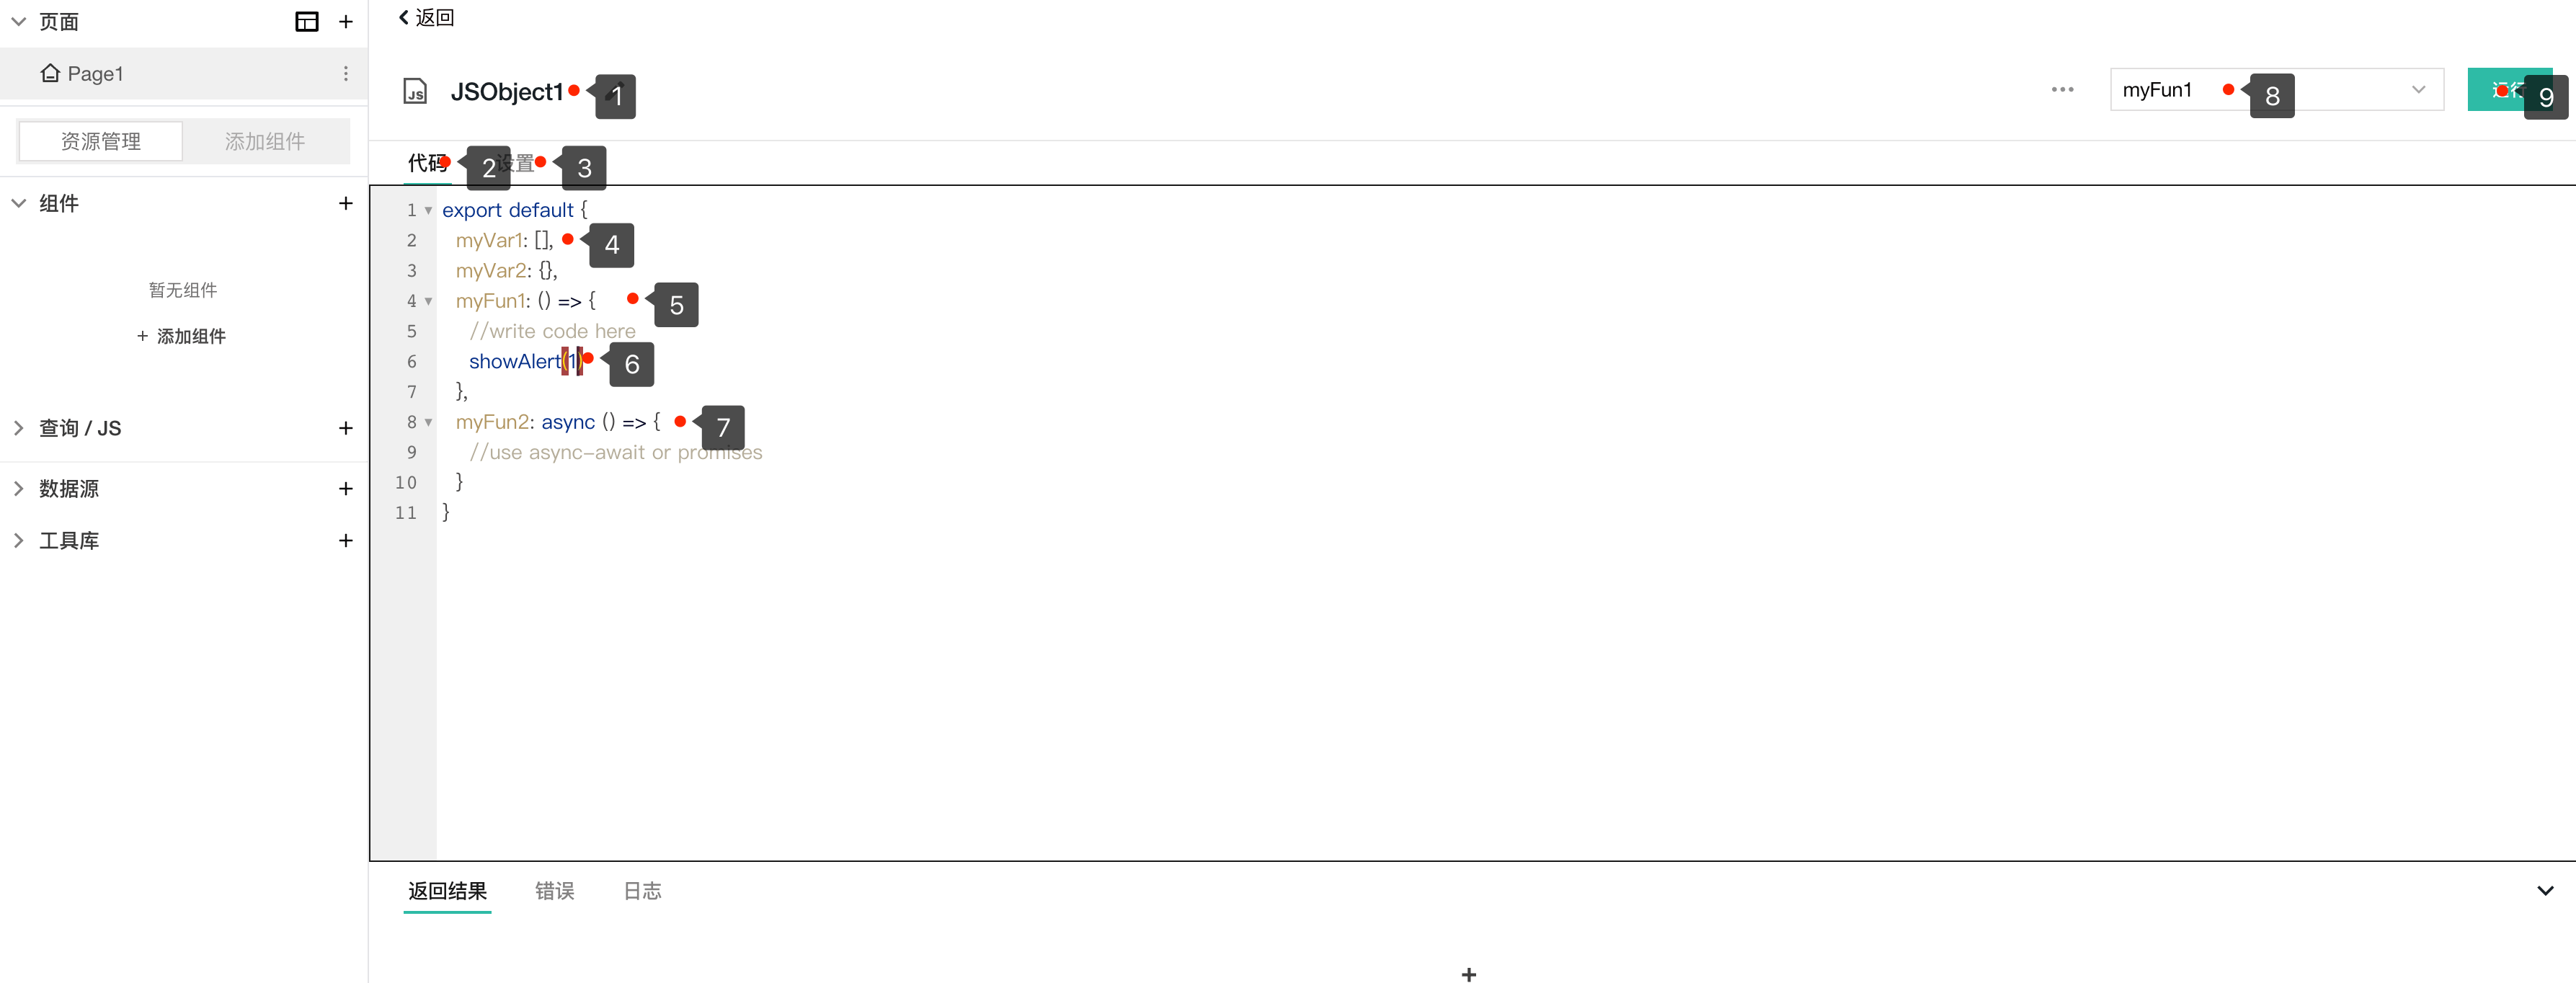
1. Can modify the name of the JS object
2. Code editing option, where you can write JS code
3. Supports setting asynchronous functions
4. Can define variables
5. Can define functions
6. Supports various content here, here are a few examples:
- Writing code
- Calling built-in or user-defined functions
- API calls
- Database query execution
7. Add multiple functions to the JS object
8. Can select the function name to execute
9. Click to execute
TIP
The defined JS objects can be used across APIs, queries, or other JS objects defined for a specific page, and have page-level access permissions; they cannot be accessed across pages.
# Calling JS Functions
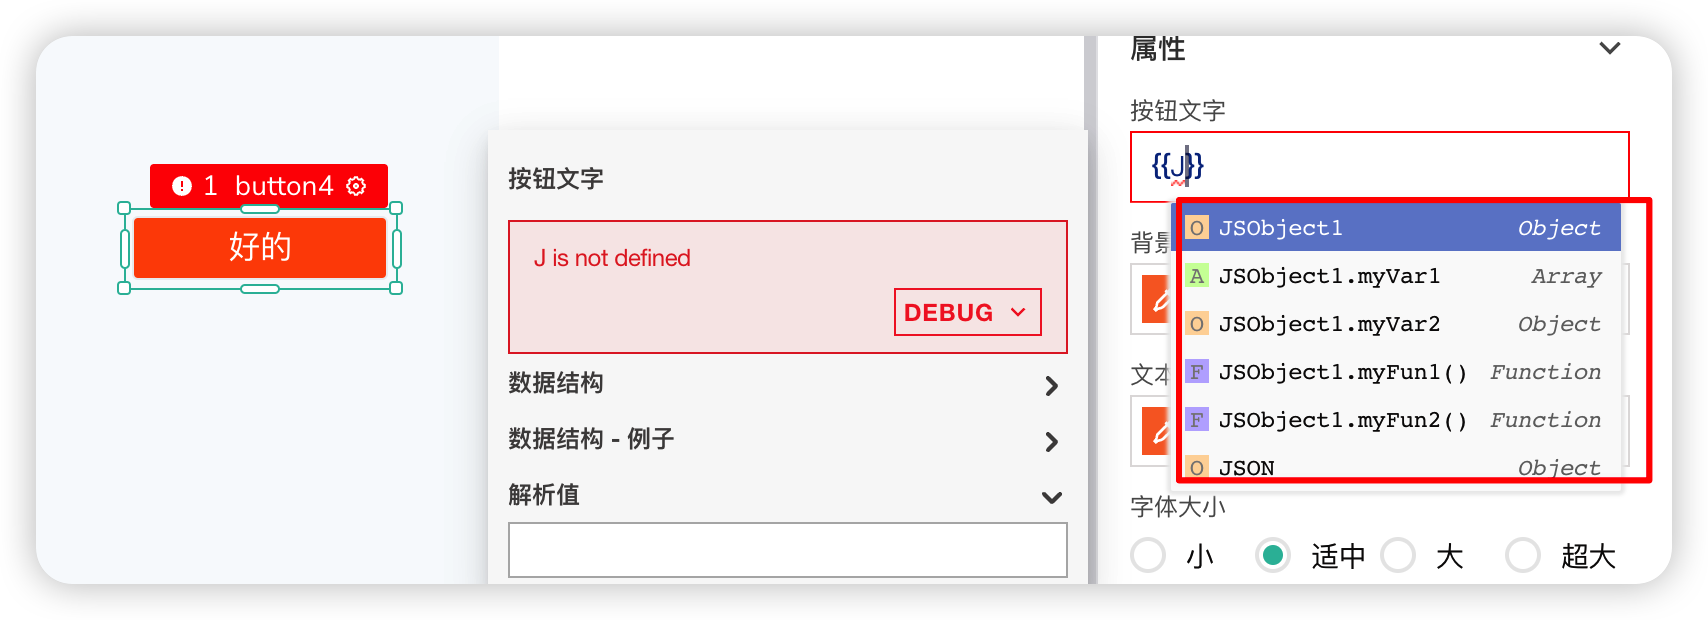
For example, if we just created a JSObject1 object above, we can call functions defined in the JSObject1 object within any component, such as inside a button component:
The property boxes of components support writing JS.
# Writing Functions Using Synchronous or Asynchronous JS Objects
Synchronous
For example, the following code snippet shows a data filter:
Api.data.filter(() => {}); // filtering data
Here, data filtering is the process of selecting a subset of data you want to view or analyze. To filter data, you must traverse the entire dataset one by one and isolate it if it meets the filtering conditions. Therefore, you need to execute it synchronously.
Asynchronous
For example, using Promises, Api.run(), Query.Run() (e.g., showModal). It essentially allows you to delay the execution of code embedded in asynchronous functions and execute it when needed.
You can configure additional settings for asynchronous functions and enhance the user experience. // TODO
# Introduction to the JS Code Editor
The JavaScript editor is a feature-rich editor that provides additional functionality while writing code. You can do many things with it.
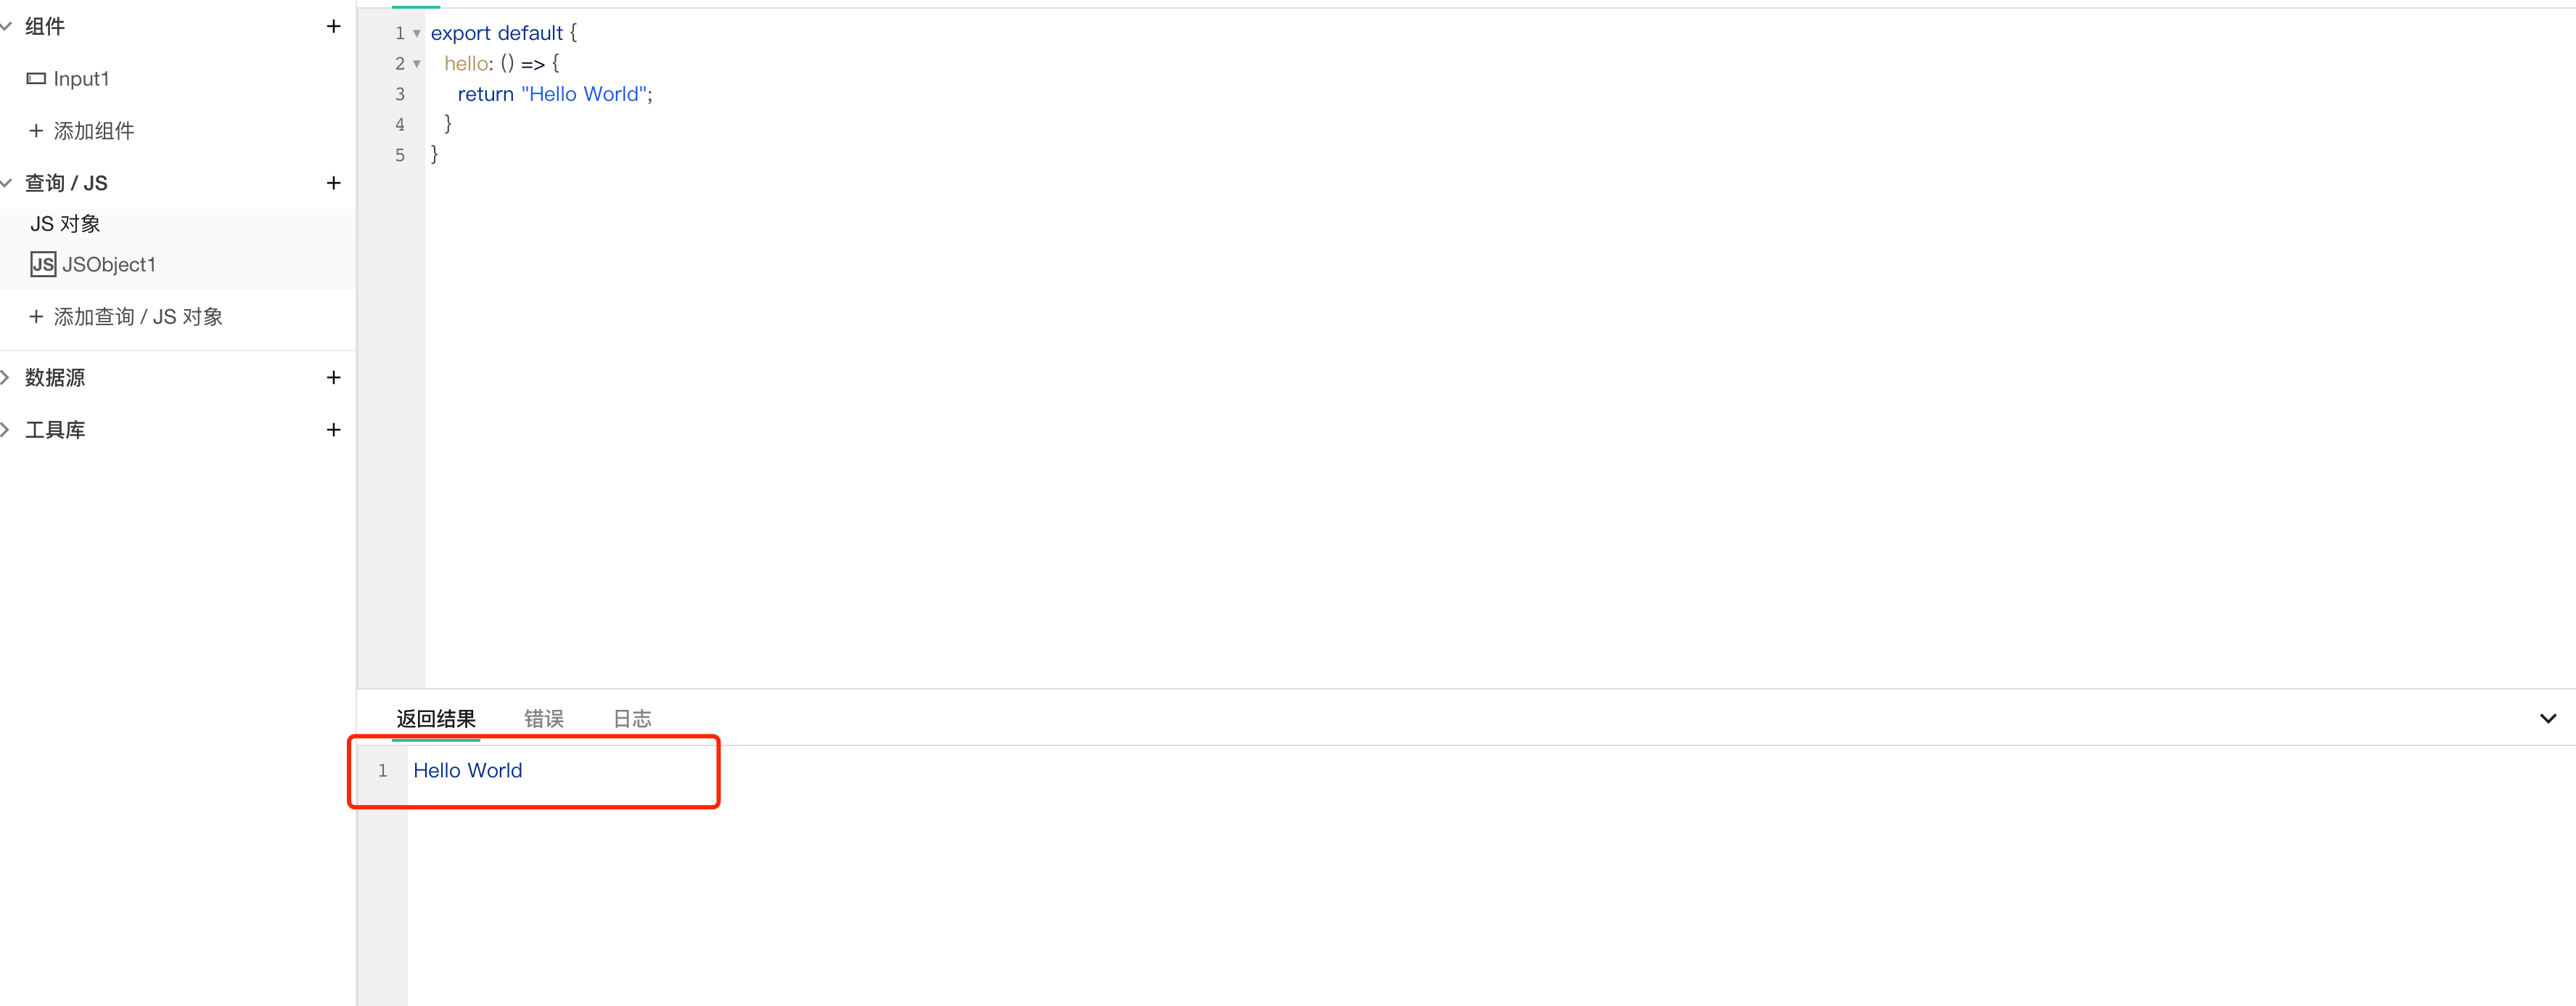
1. Return Result Option
During development, you can view the output in the return result option after executing each function.
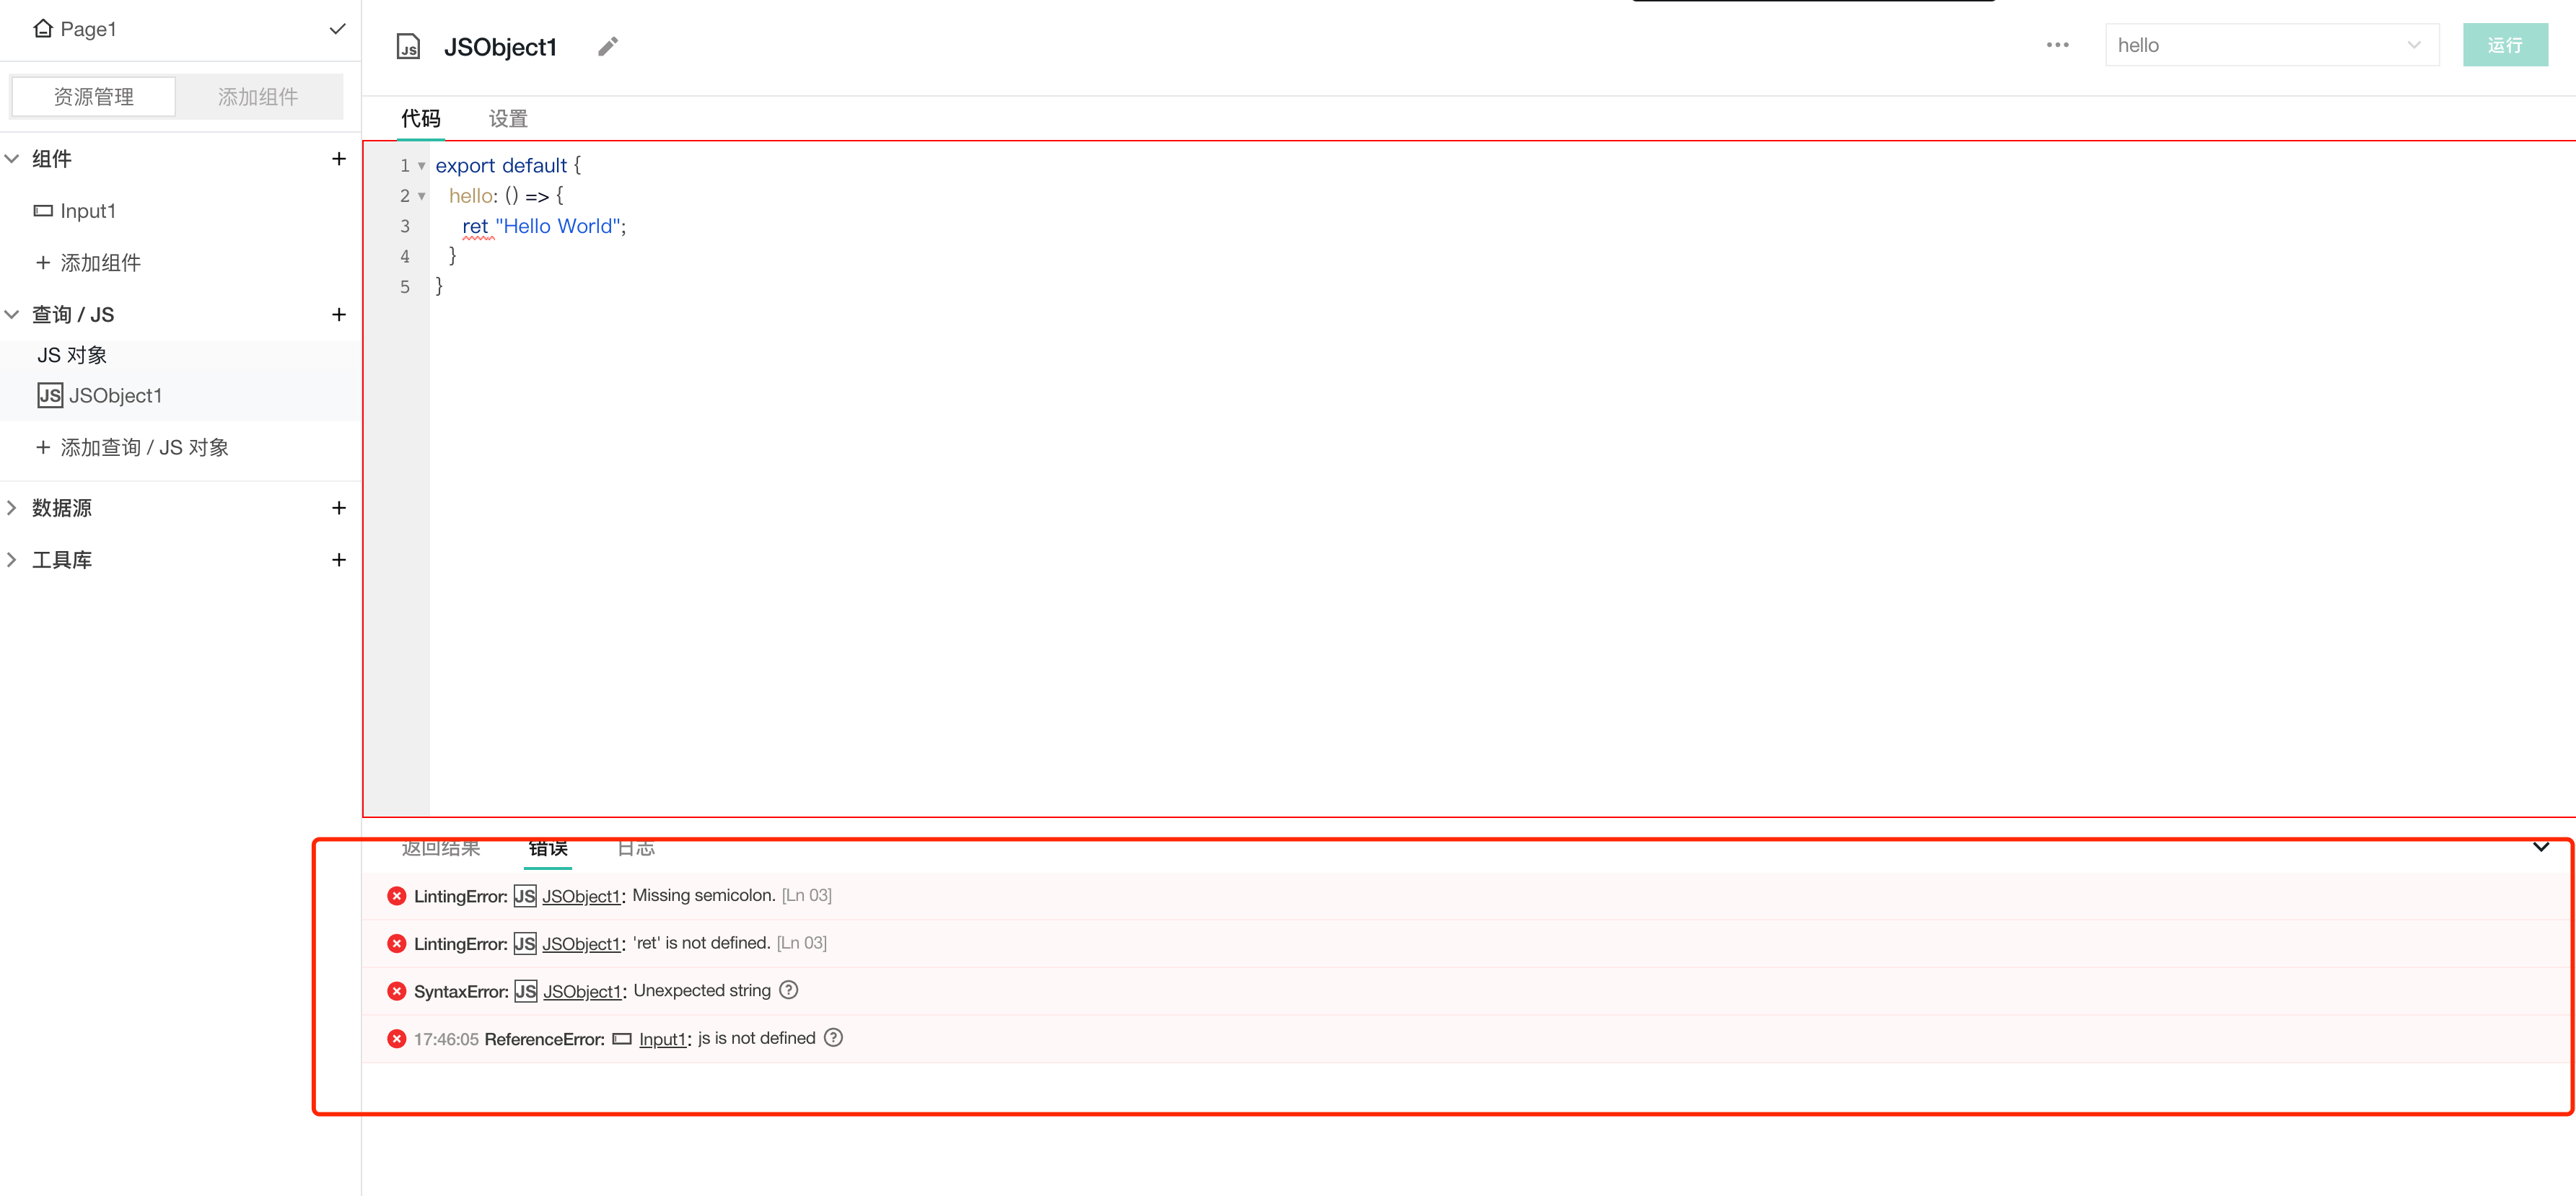
2. Coding Error Checking
The JavaScript editor automatically checks your source code for programming errors. If the code is programmatically incorrect, it highlights the error with a red wavy line below the erroneous code. For example, syntax errors like return misspelled as ret are also caught by linting.

3. Error Option
The error tab displays all types of errors generated during code execution. These errors may include syntax errors, runtime errors (such as parsing errors), etc.
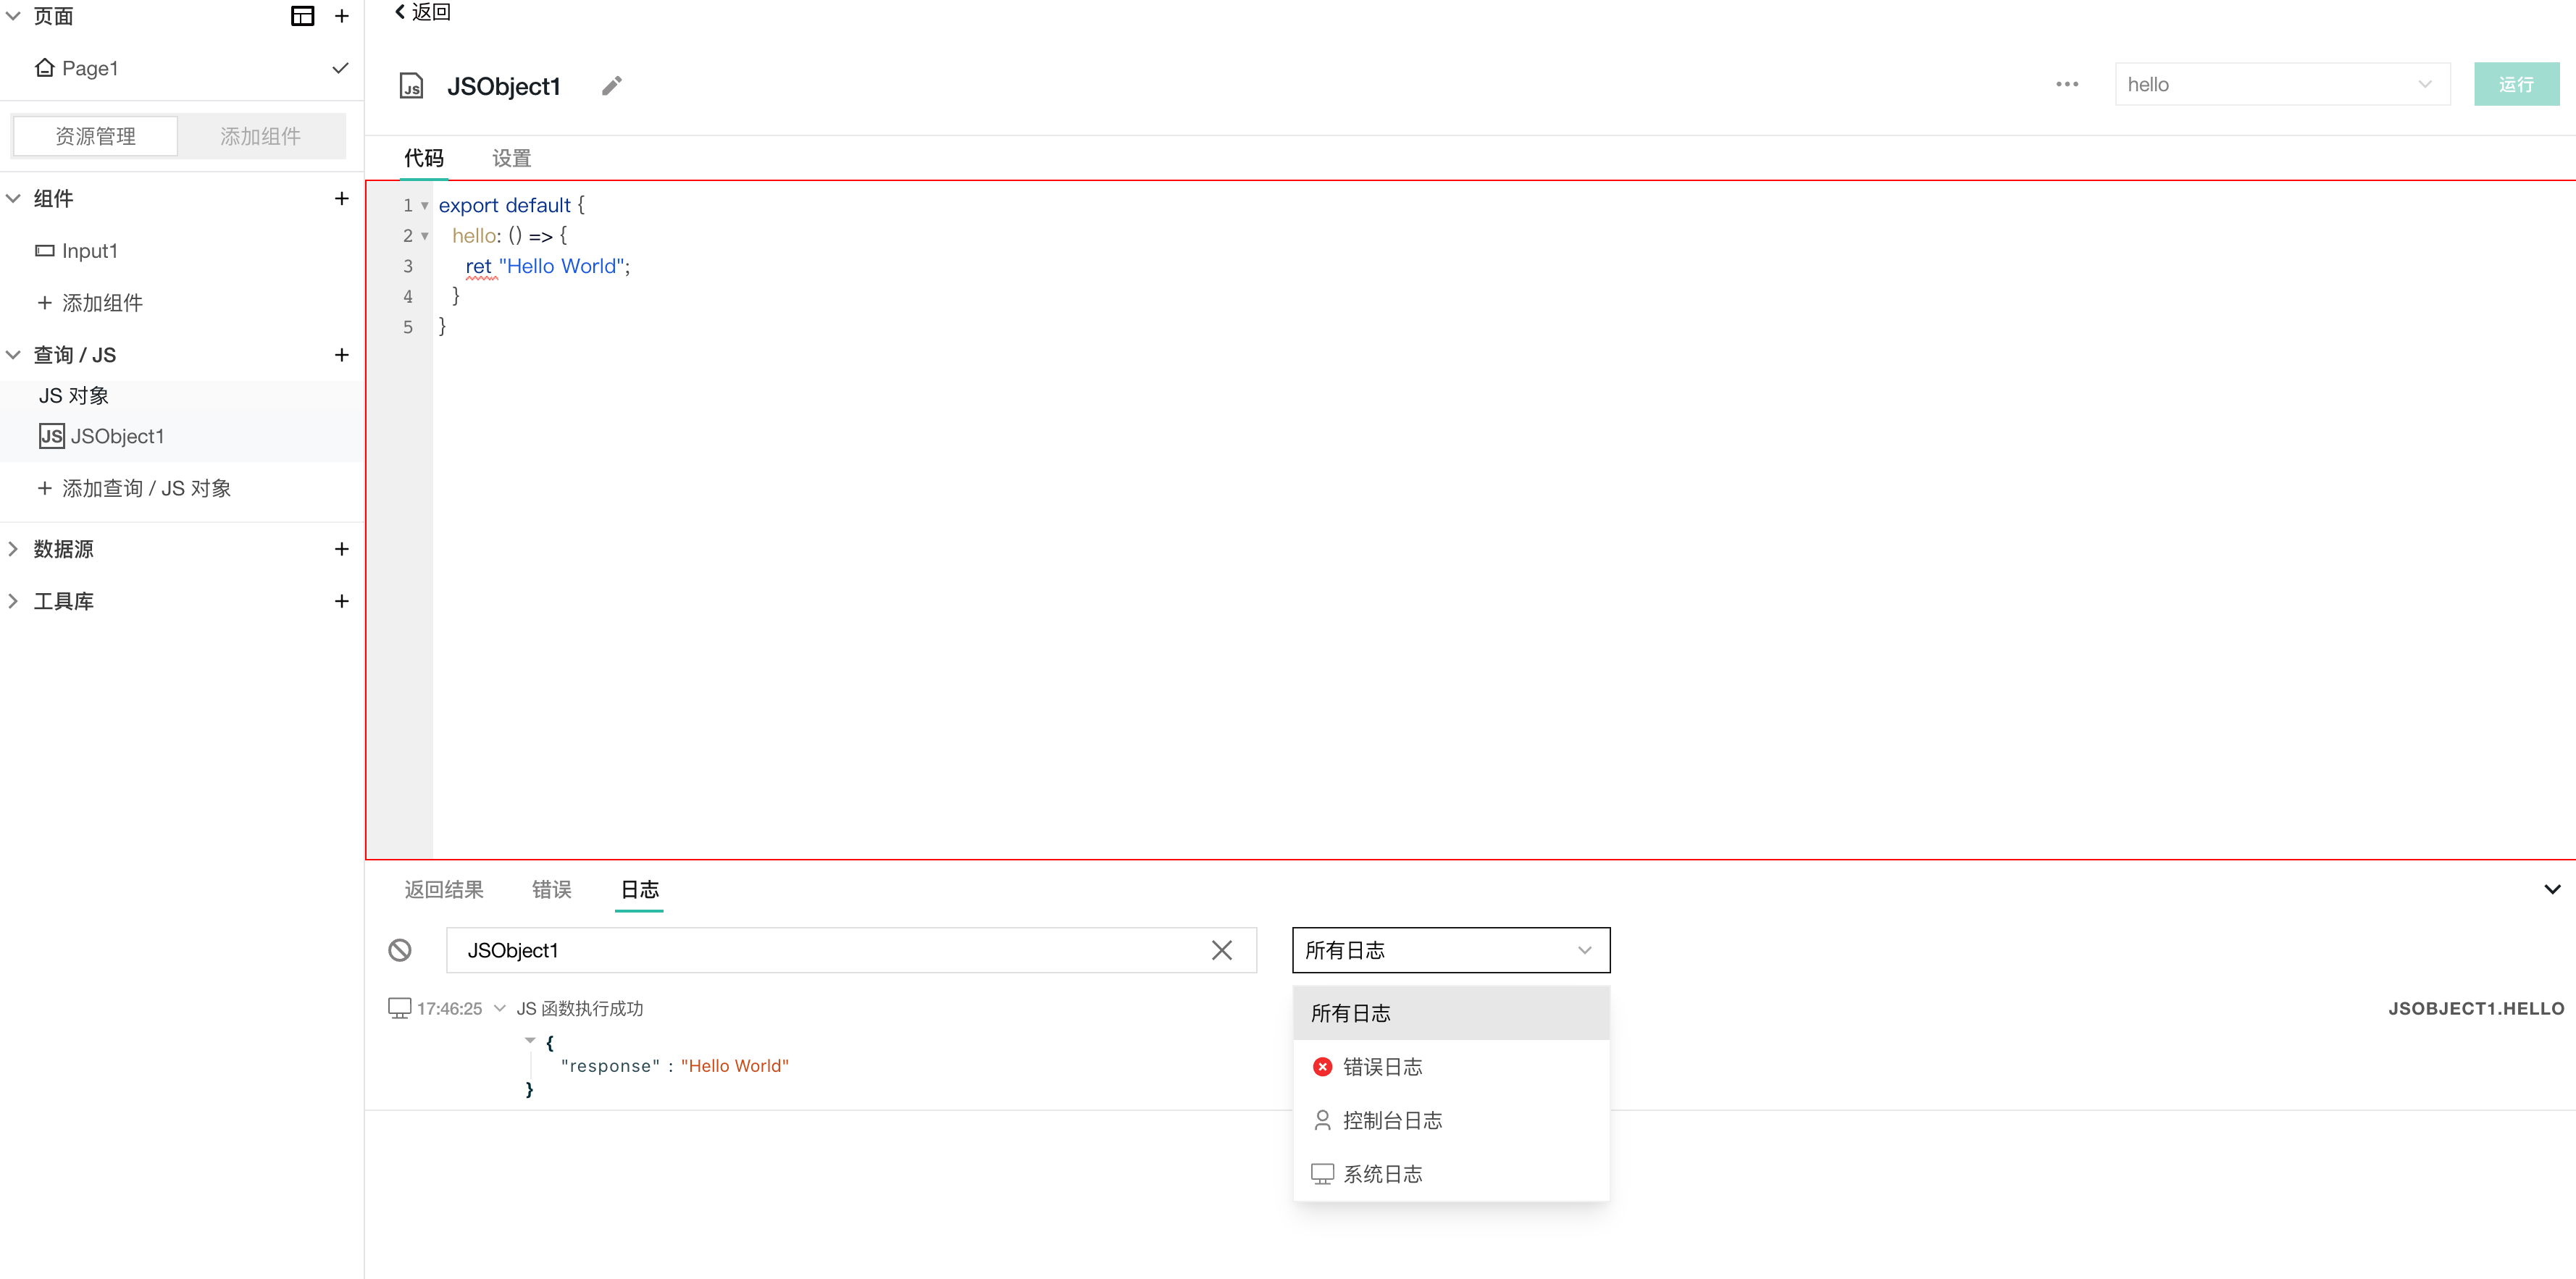
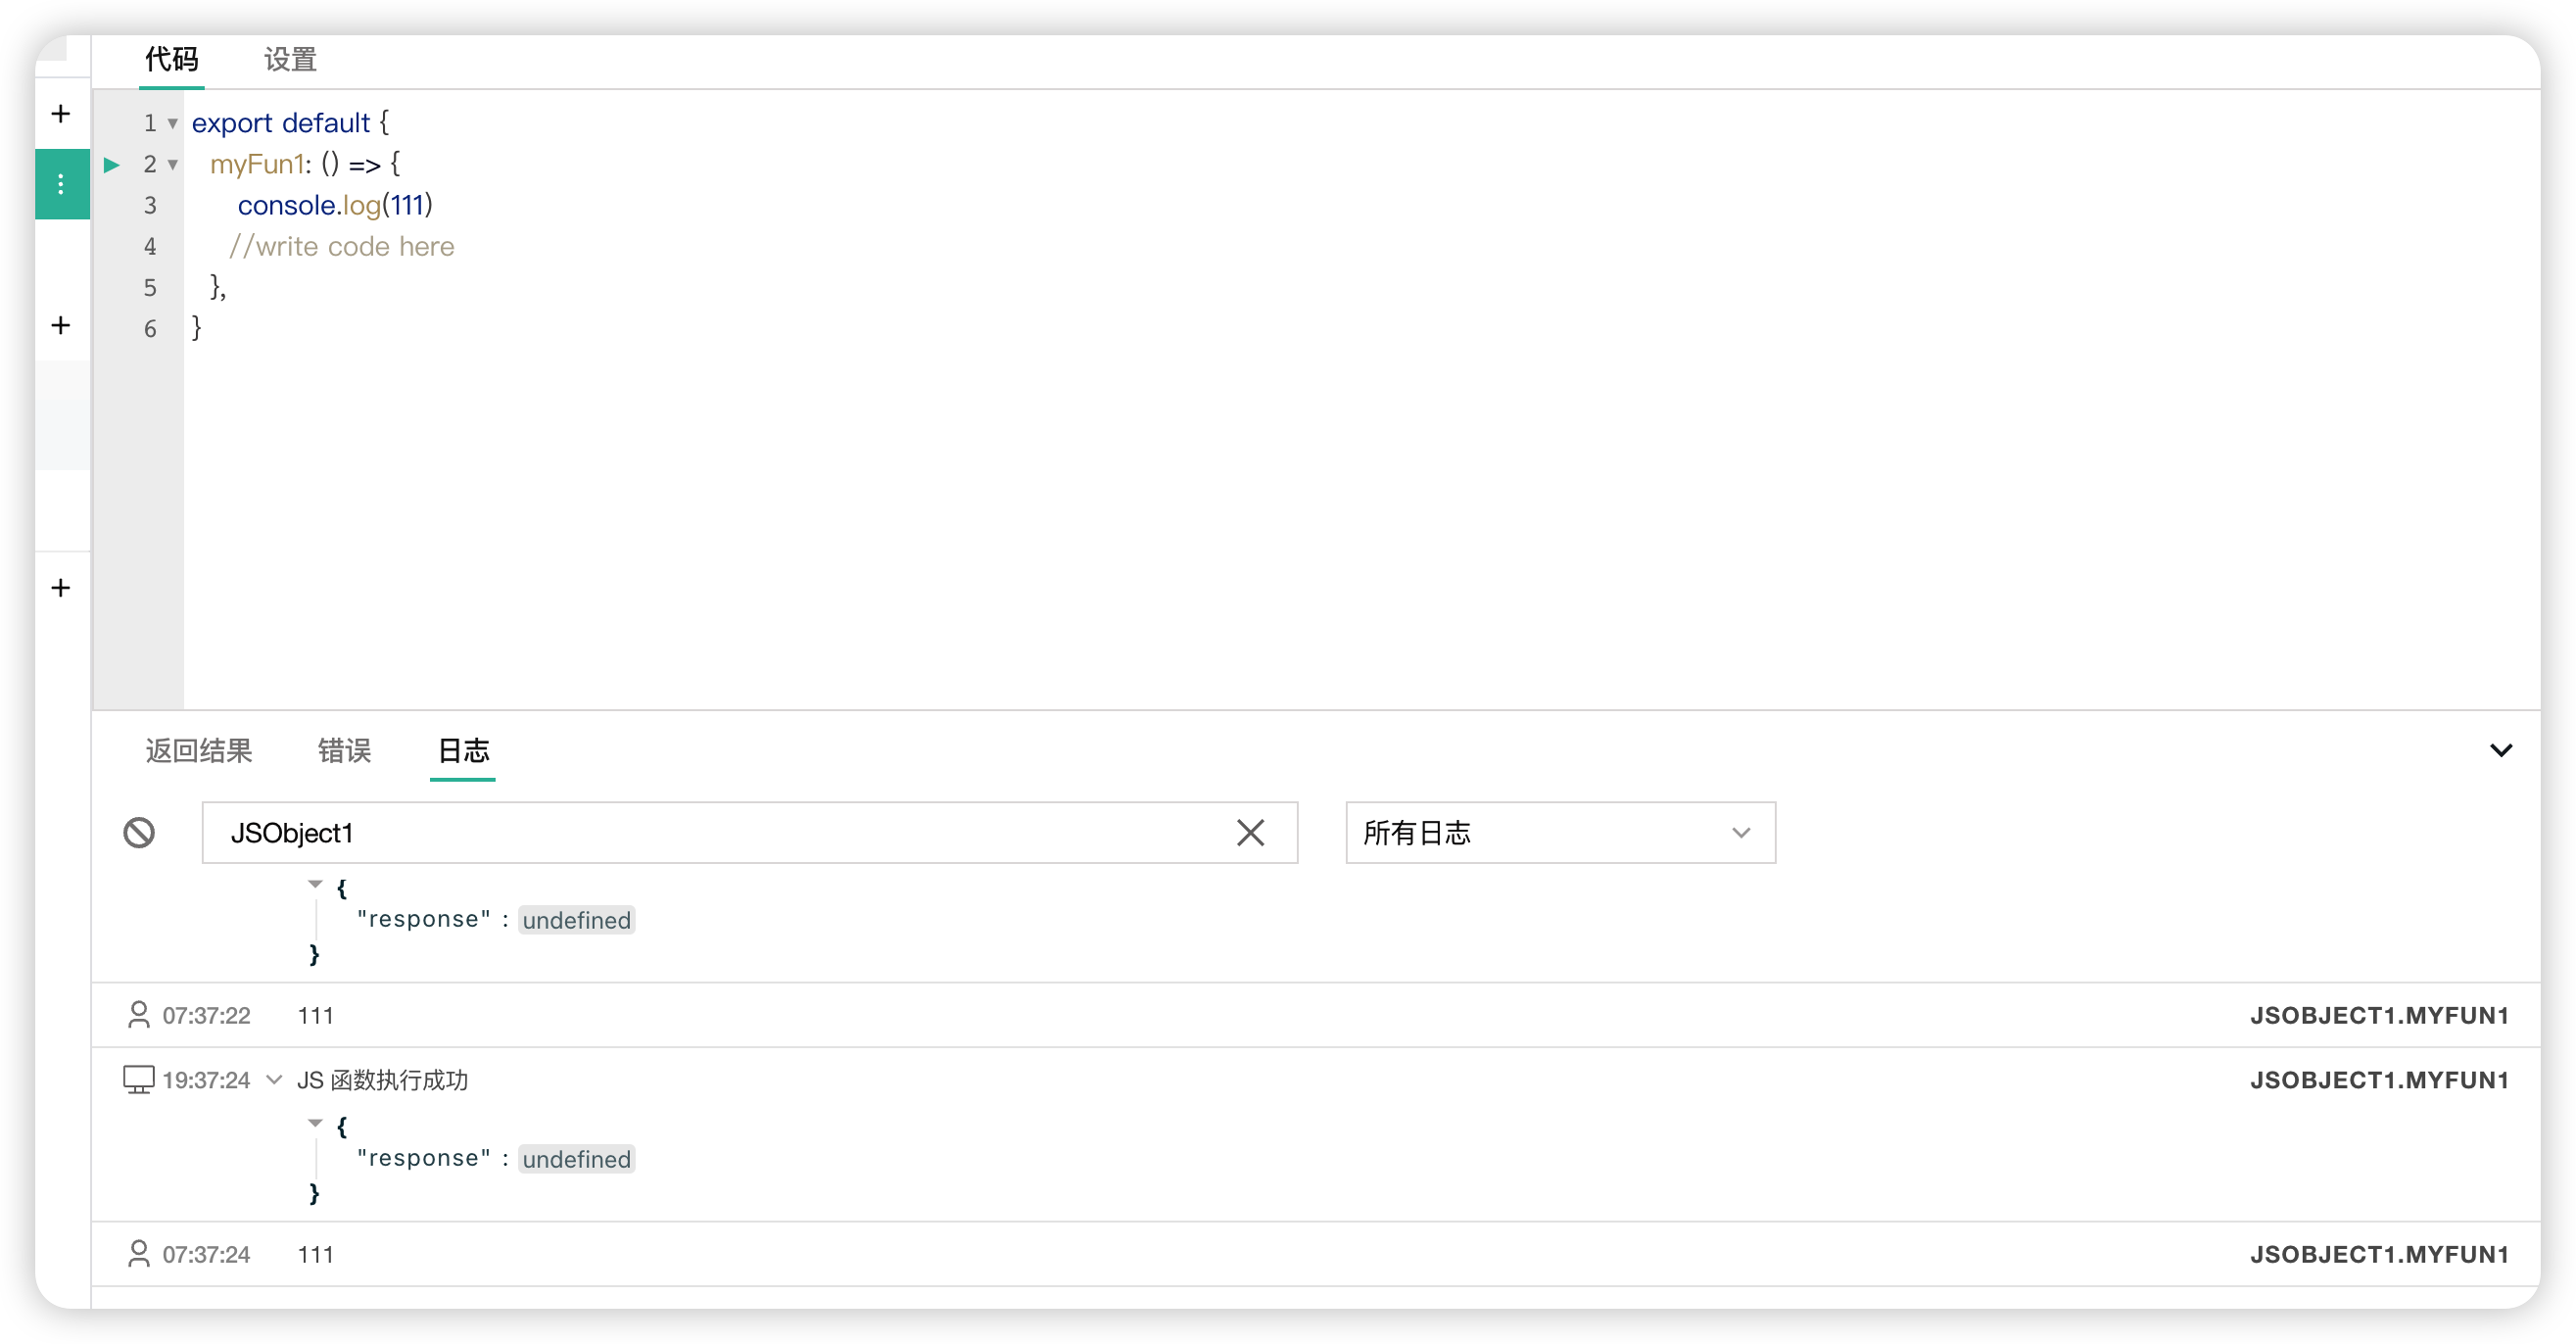
4. Log Option
The log option displays the timing of execution. You can also open the "Log" option by clicking the debug icon in the lower right corner of the console (as shown in the screenshot below). In the log option, you can flexibly filter logs by entering keywords in the filter box or selecting log types from the dropdown.
Example
You can add the following code snippet:
export default {
   hello: () => {
      return “Hello World”;
   }
}
Note
You can click the Run button in the upper right corner to execute JS functions. If your JS object defines only one function, the editor defaults to that function name. But if your JS object defines multiple functions, you can select the function to execute and then click Run.
# debugger and console Functions
You can use debugger or console.log() to debug your code and inspect it in the browser console respectively. This allows you to check the code's status and examine it line by line to help identify and fix any errors.
The console object only supports the log, error, and warn methods. You can also use the info and debug methods. However, these methods provide the same functionality as the log method.
# console.log() Usage
You can use console.log() to print information about your code to the browser's console, helping you check variable values or the application's state at different points during code execution.
console.log(<VARIABLE_NAME>)
When you run your code, the value of <VARIABLE_NAME> will be printed to the browser's console. Check if it matches your expectations.
Example
- First, create an API named
get_users:
https://mock-api.appsmith.com/users
- Create a JS object to print the API data:
Enter the following code into the code editor:
export default {
    getUser: async () => {
			const res = await get_users.run();
			console.log(res);
    }
}
Then click Run in the upper right corner, and you will see the returned data from the API printed.
- Extension: Let's try printing a variable value:
export default {
    getUser: async () => {
        const {users} = await get_users.run();
        console.log(users);
        users[0].id = 5;
        console.log(users[0]);
    }
}
# debugger Function
We can insert a debugger statement at the point in the code where we want to pause, and then run your application. When the debugger statement is reached, code execution will pause; it works similarly to a breakpoint. You can then use the debugger tools to step through the code, inspect variables, and observe the code's execution.
# Writing REST APIs
You can add REST APIs to request data.
Usage Introduction
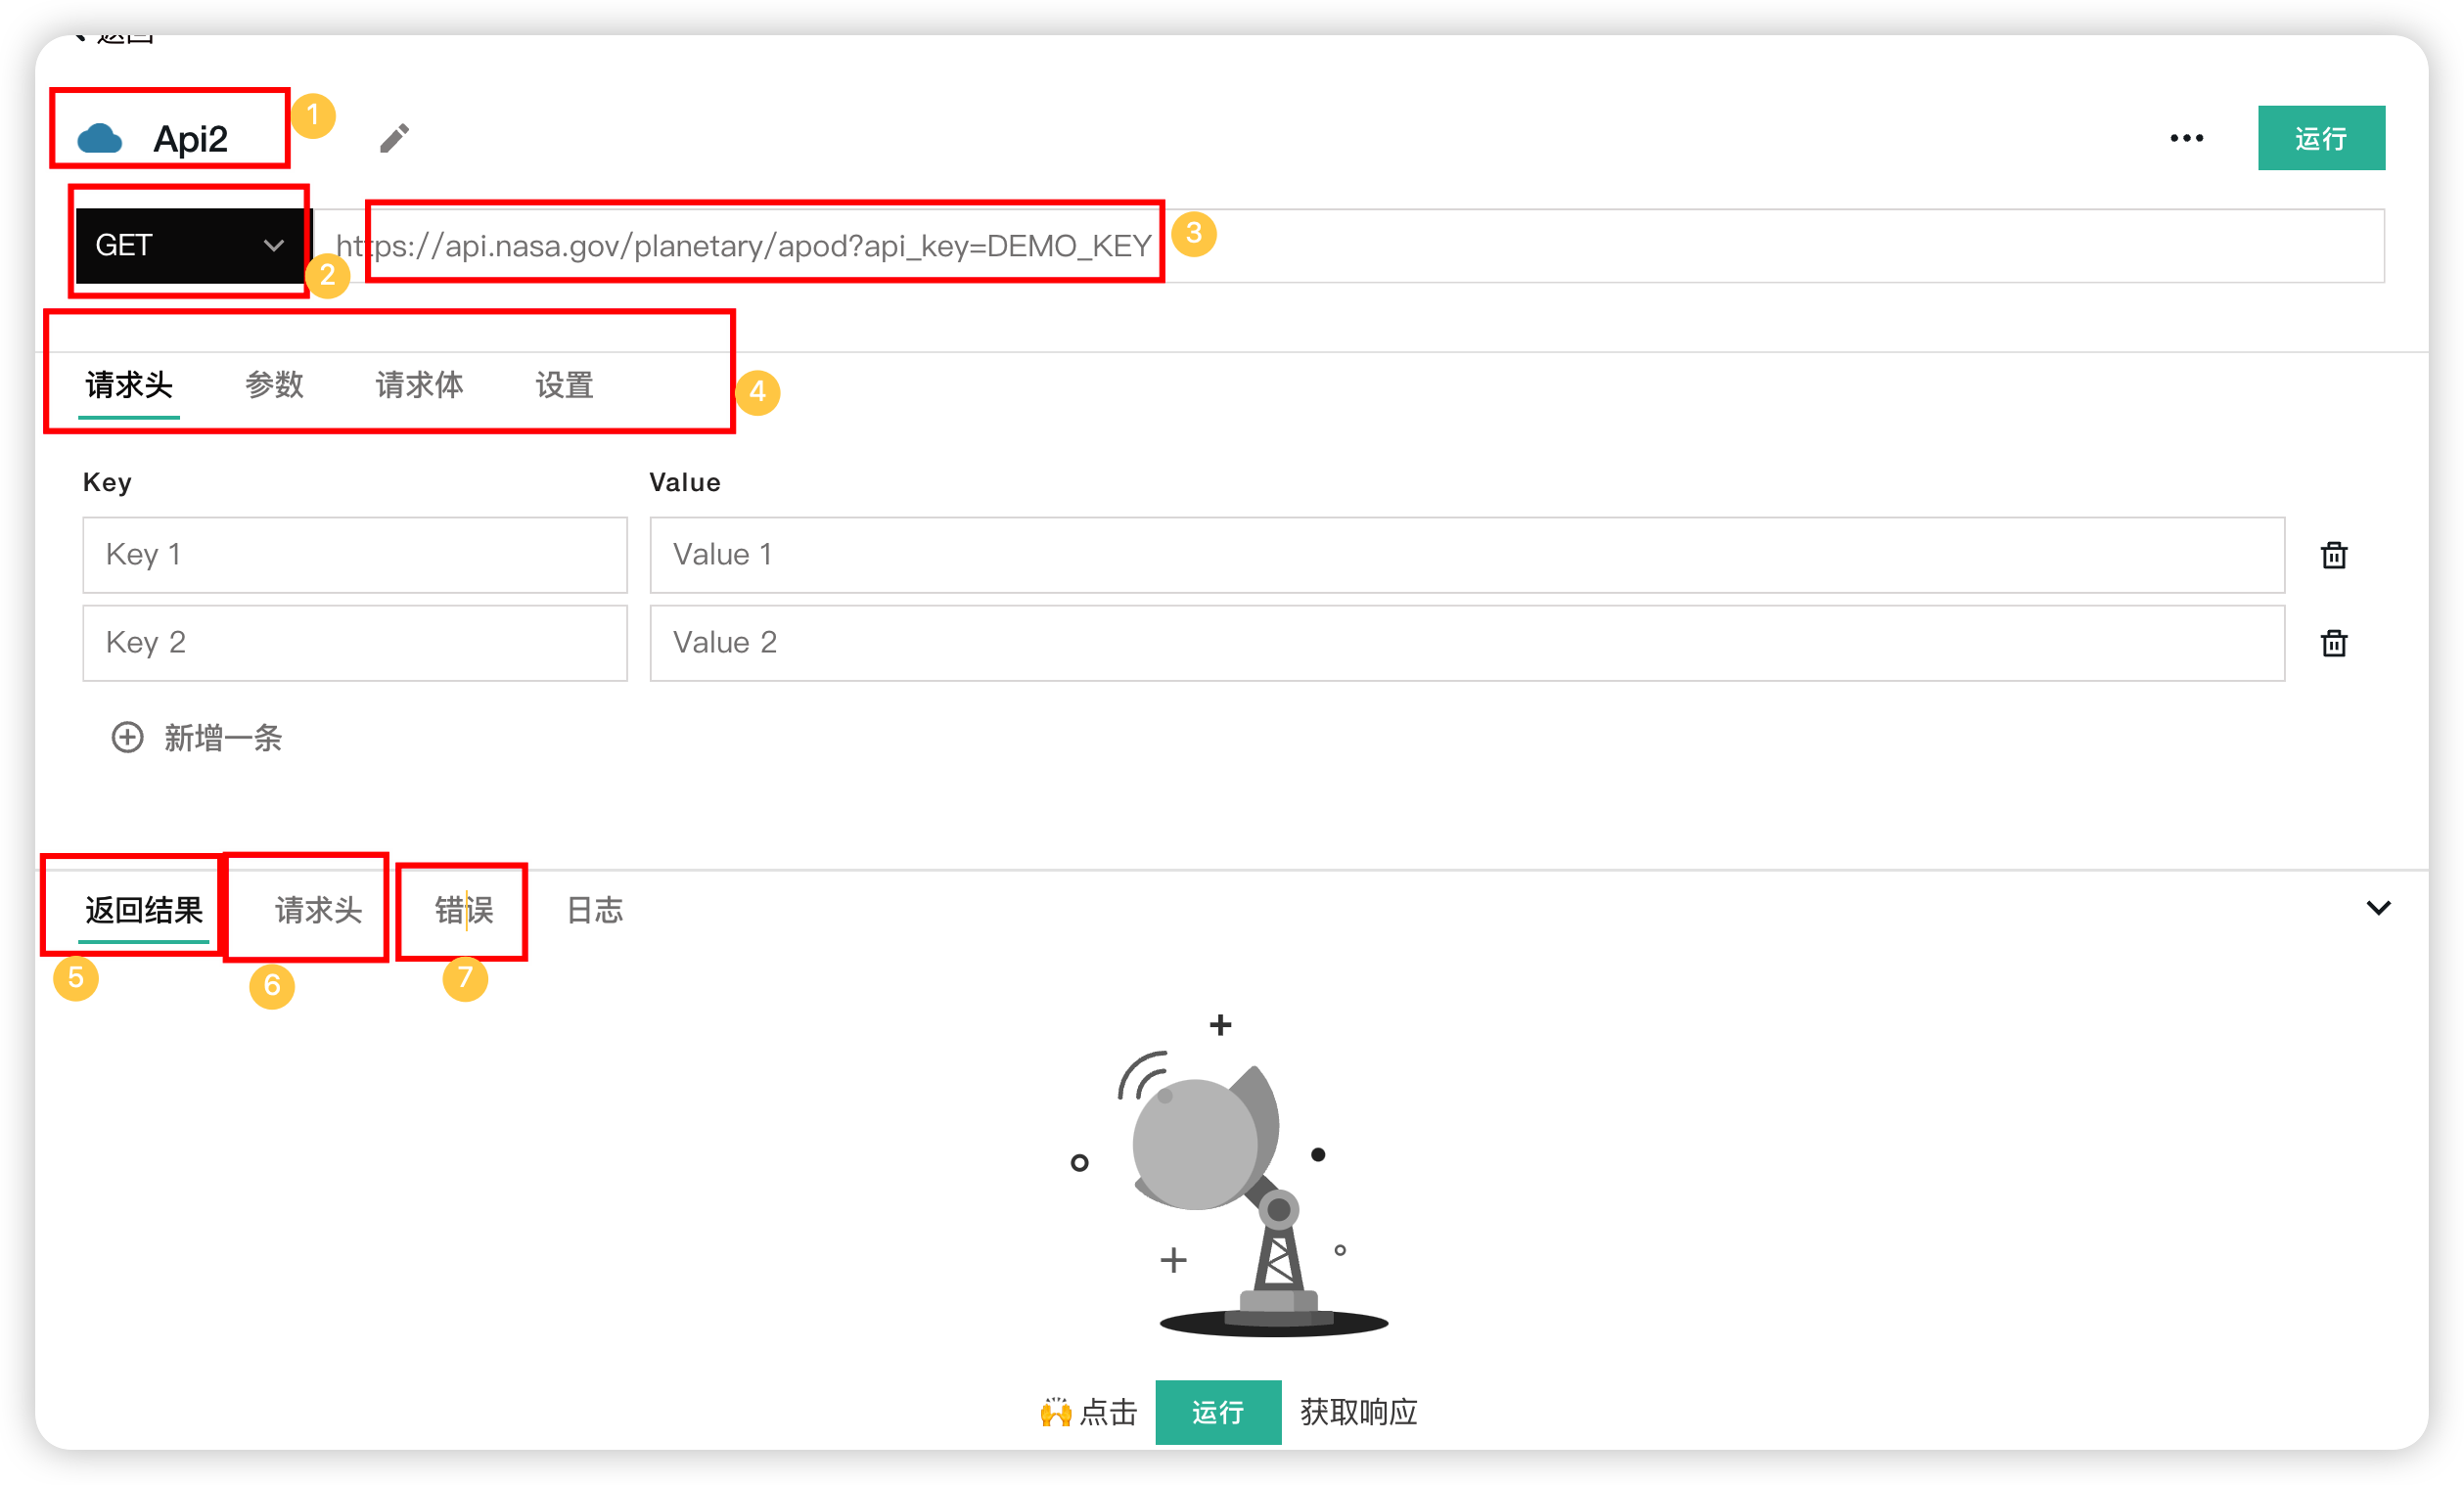
- The name of the request, which can be changed.
- Request method, options include Get, Post, Put, Delete, Patch.
- Request URL, needs to be checked for availability.
- Request headers and parameters, added in key-value format. For the request body and settings, see the figure below.
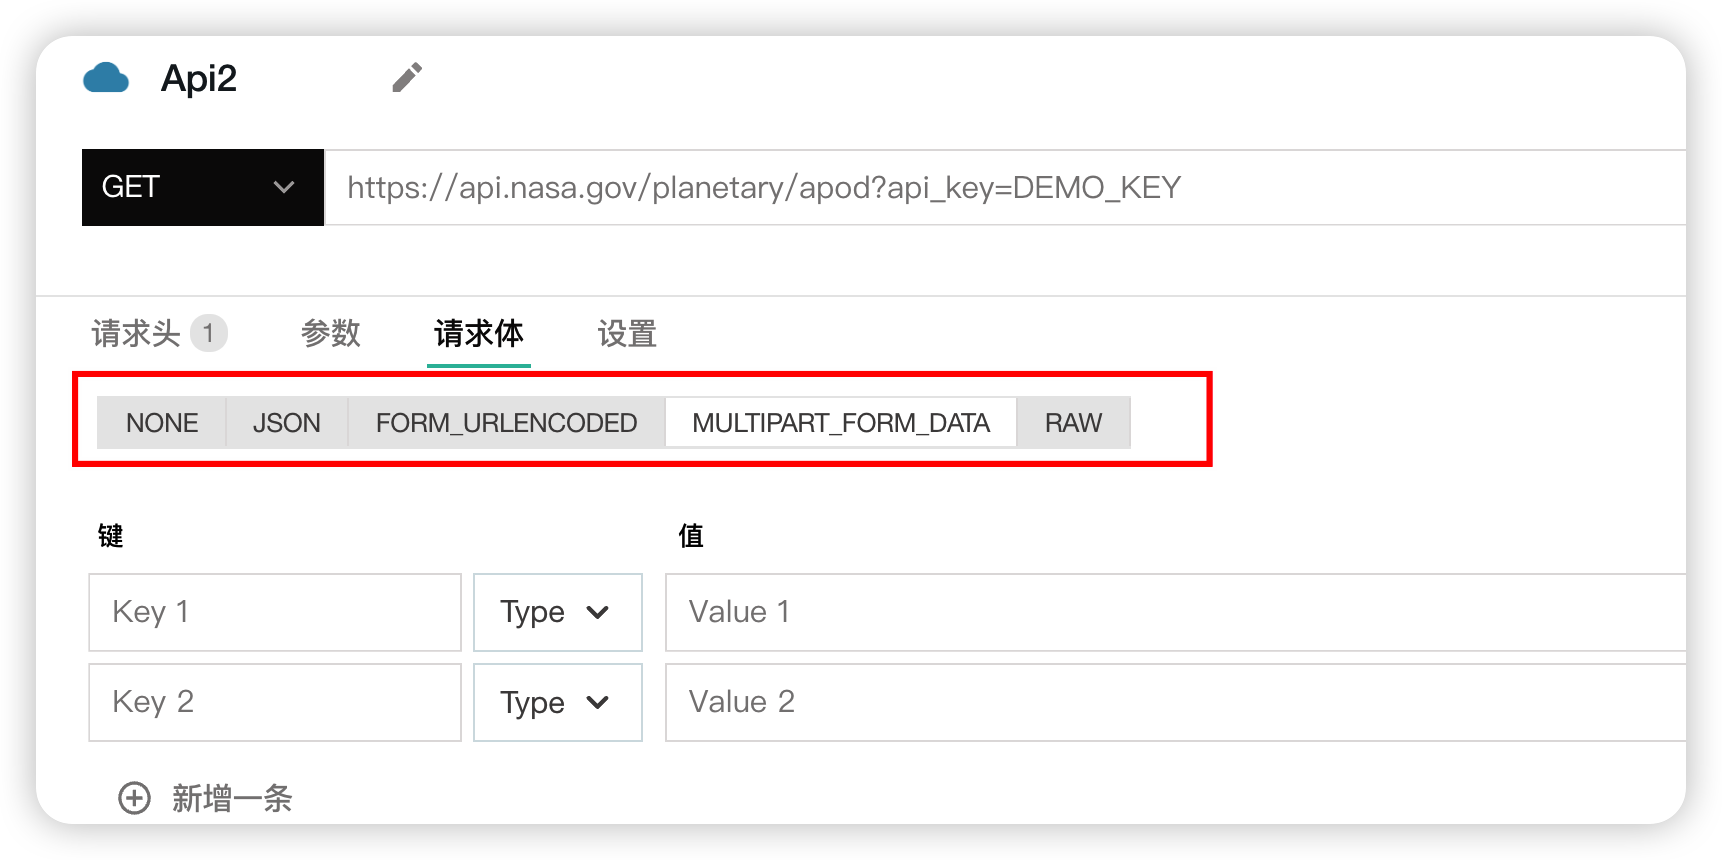
The request body can be carried in multiple formats.
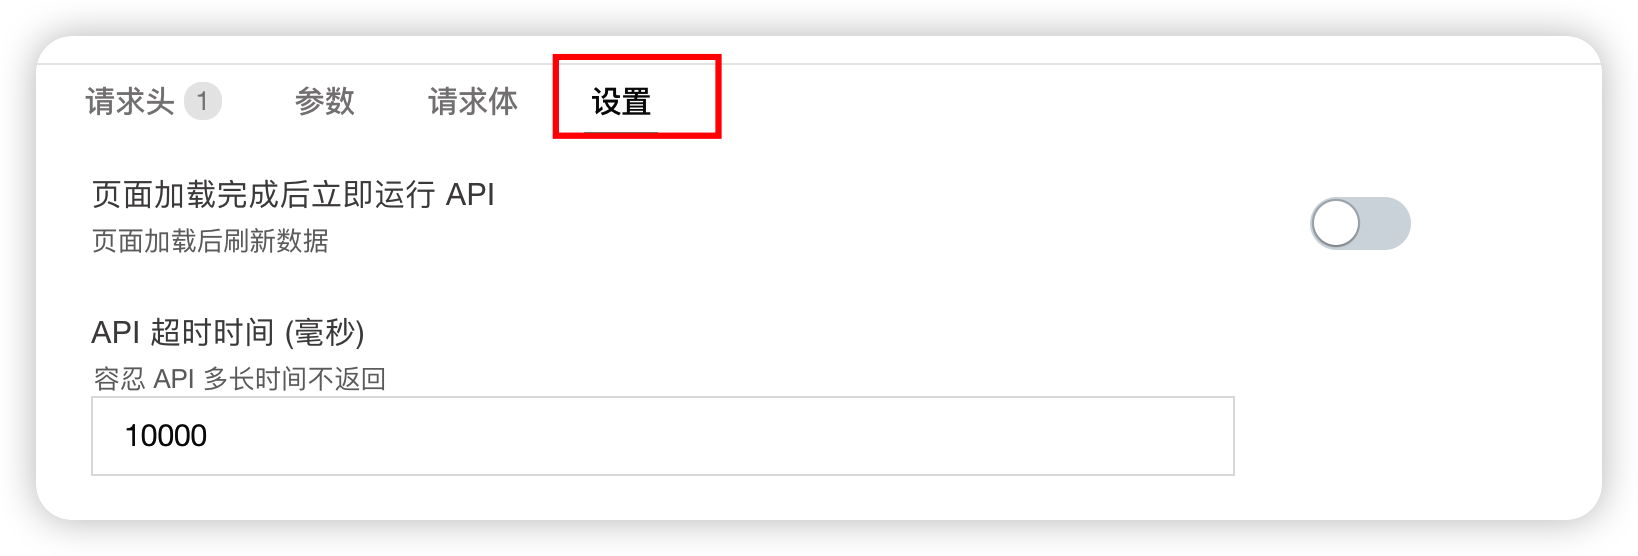
Settings
You can set the execution trigger (e.g., send request immediately after page load) and the API timeout duration.
- Click Run to see the returned result here.
- The request headers carried when sending the request can be seen here.
- If the request fails, error information can be seen here.
# API Calls
Calling APIs using async await is not supported. Please use the callback method to call APIs.
// Using Callbacks
{{
    MockApi.run(() => {
      // Success callback
      // MockApi.data is the data upon successful request
    },() => {
      // Failure callback
    })
}}
# Introduction to Array Operations
Introduces commonly used array methods, with some simple examples provided below.
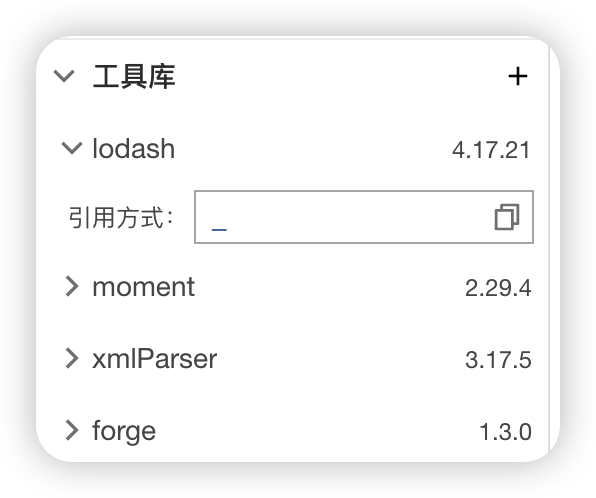
Using Lodash
Lodash is preloaded in the utility library by default. Lodash is a consistent, modular, high-performance JavaScript utility library. Below are some examples of using Lodash library methods to operate on arrays. If you want to learn more operations, please refer to the Lodash documentation. // TODO
| Method | Introduction | Example |
|---|---|---|
| _.head(array) | Returns the first element of the array | 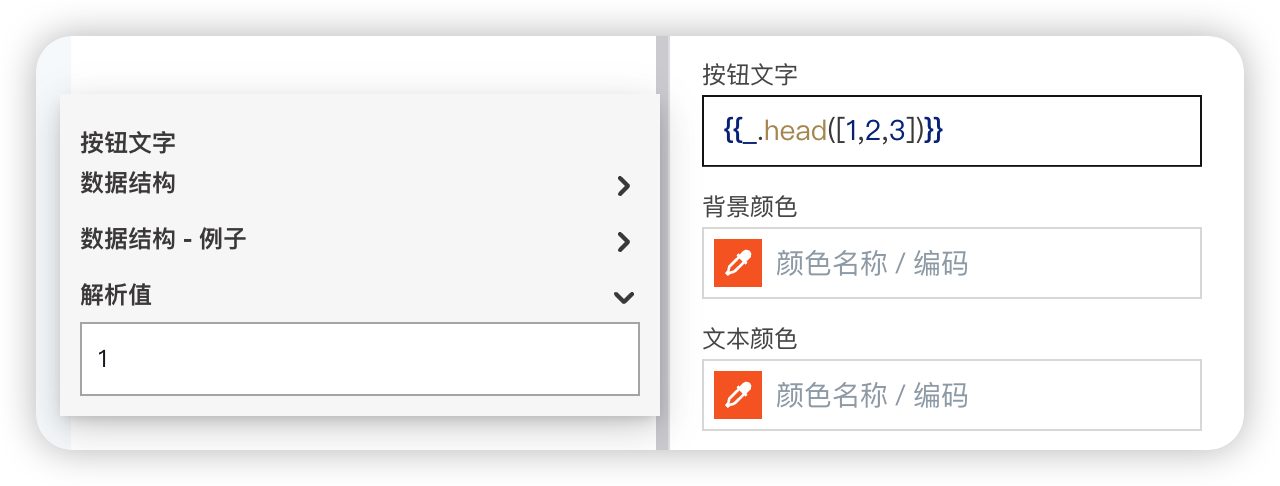 |
| _.last(array) | Returns the last element of the array | 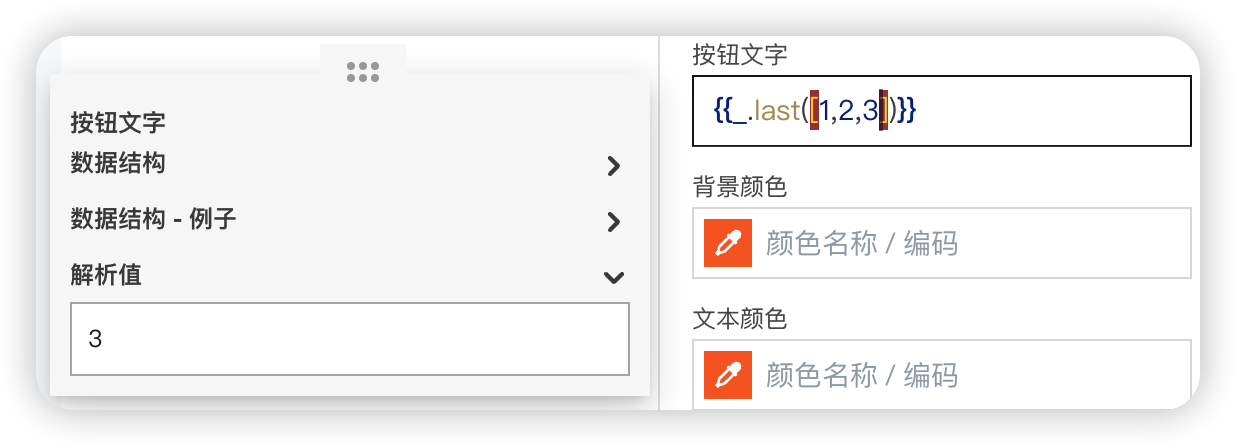 |
| _.nth(array, n) | Gets the nth element, n can be negative (e.g., get the third element) | 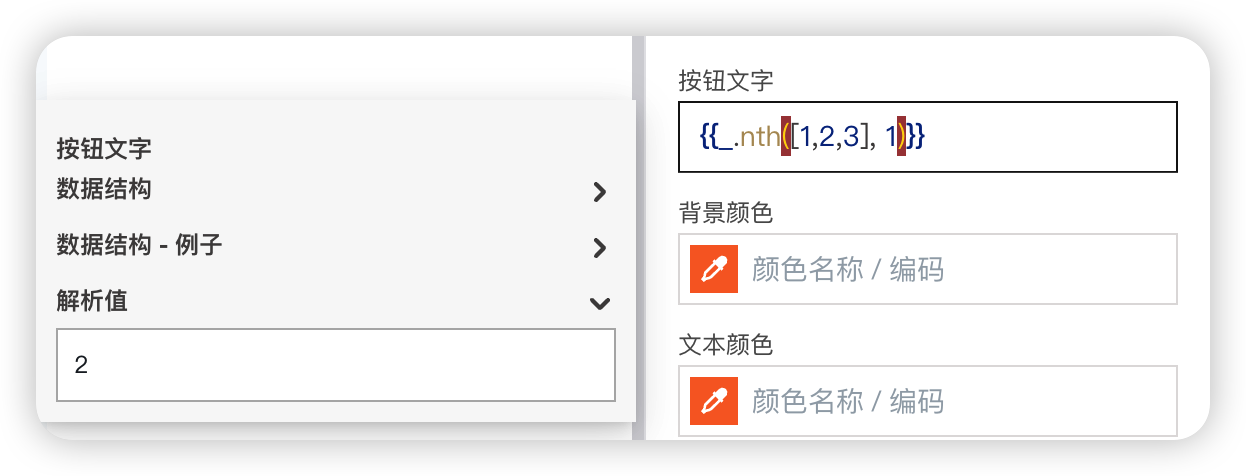 |
| _.chunk(array, size) | Splits the array into multiple small arrays of length size; the small arrays form a new array | 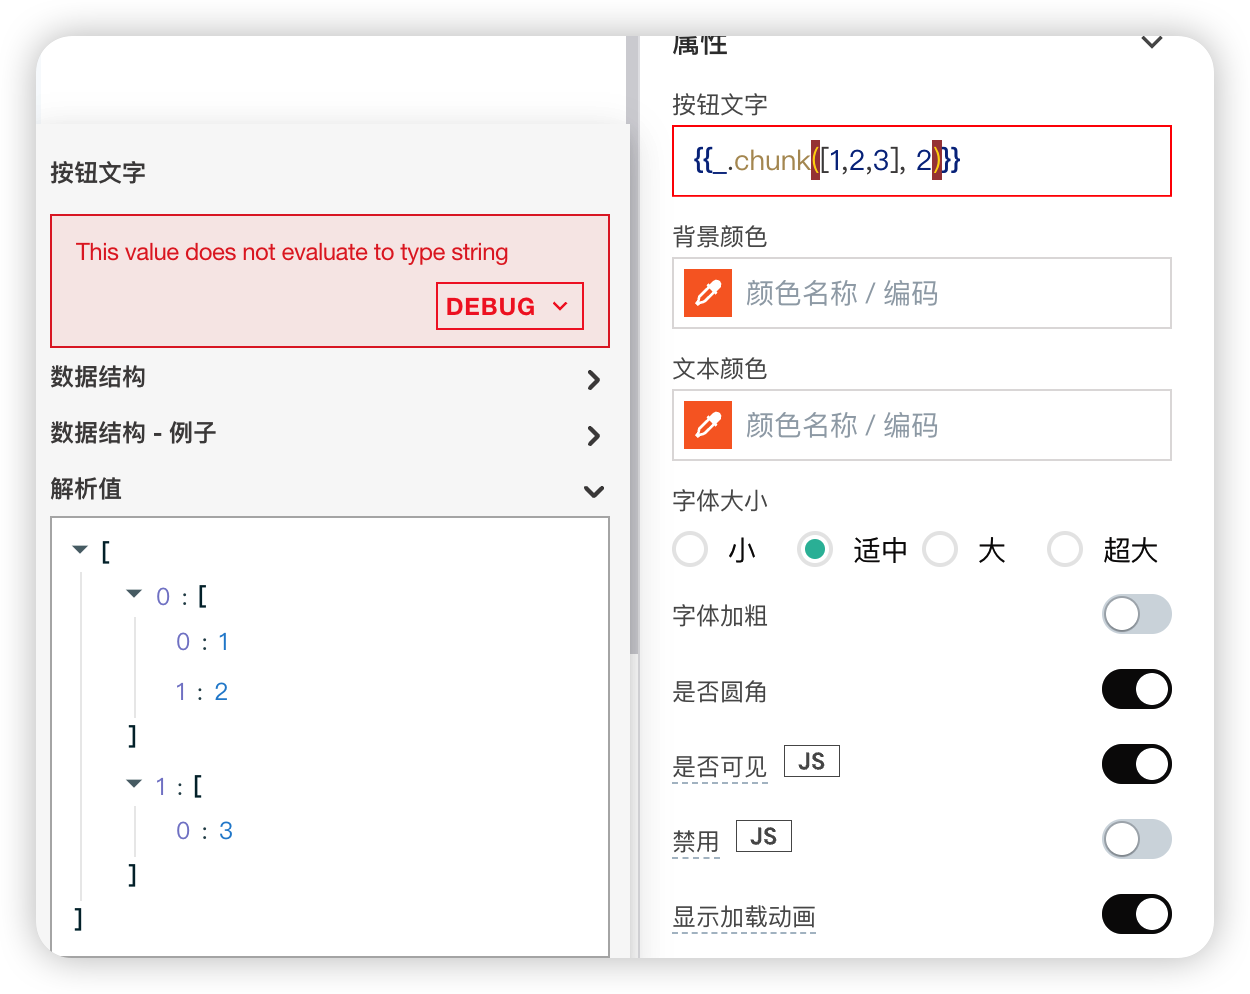 |
| _.uniq(array) | Deduplicates the array | 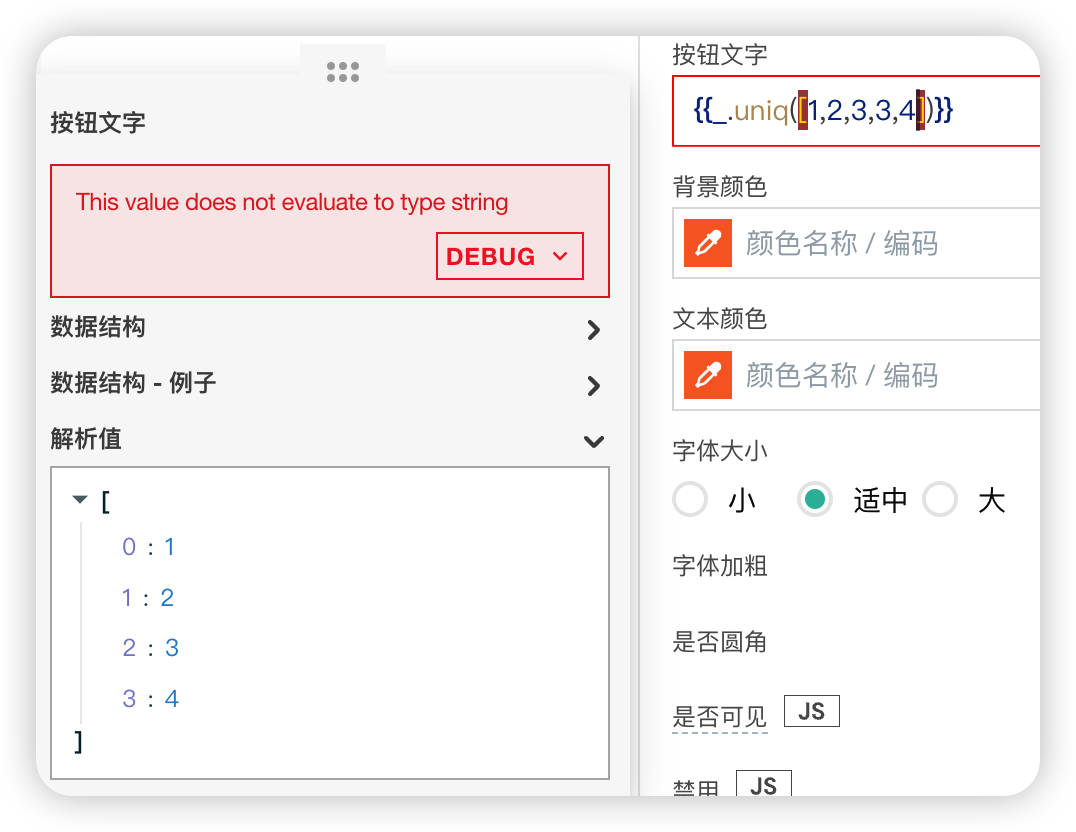 |
| _.initial(array) | Removes the last element of the array | 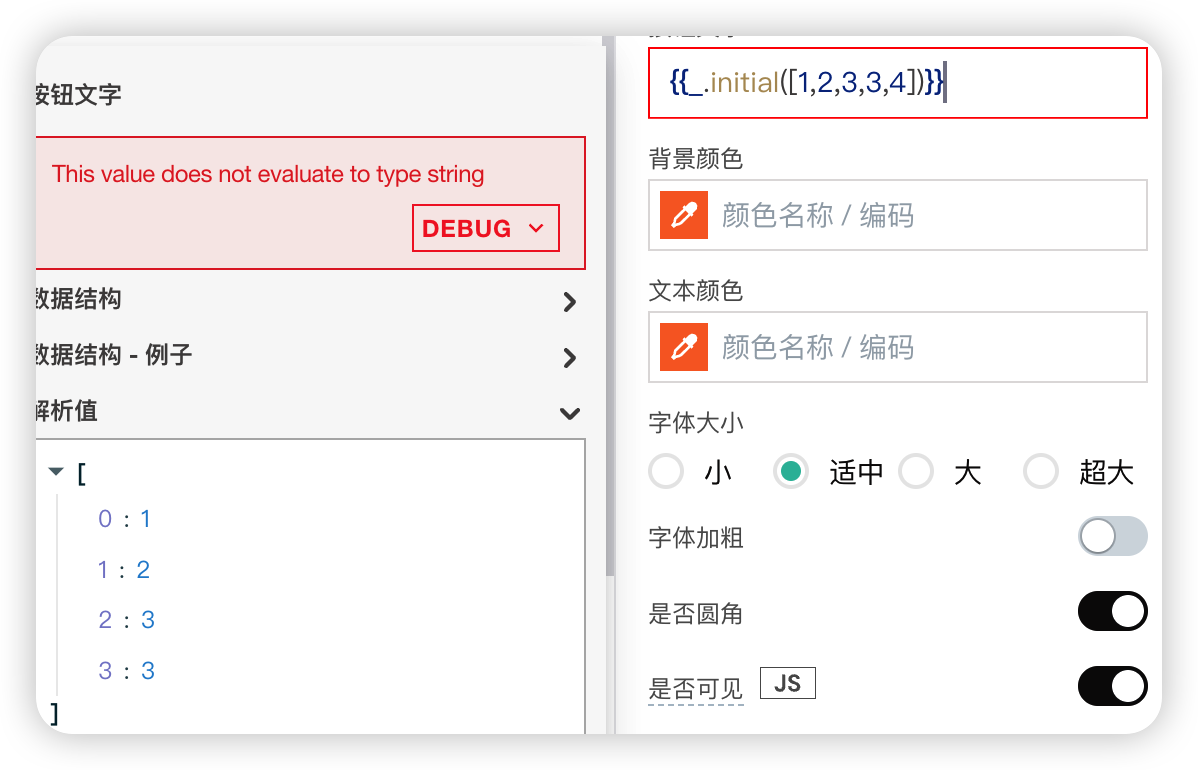 |
| _.pull(array, [values]) | Removes all elements from the array array that are equal to [values] |  |
| _.tail(array) | Removes the first element of the array | 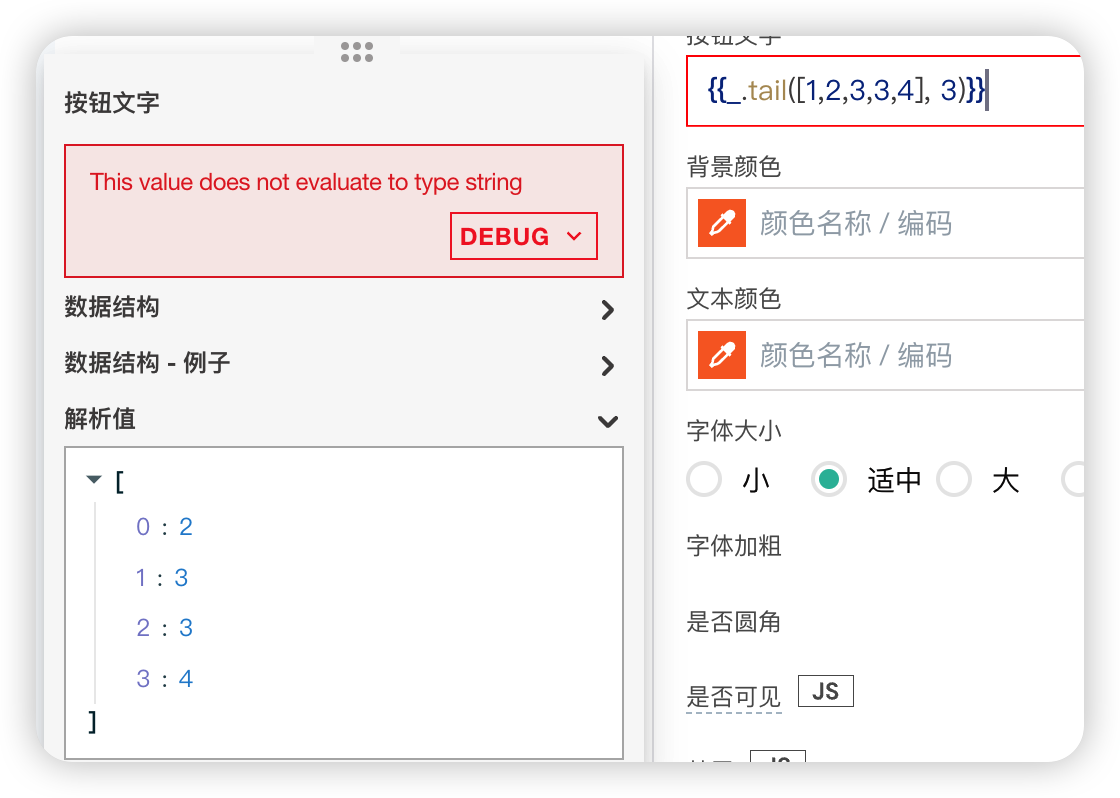 |
Commonly Used Array Operation Methods
| Method | Introduction |
|---|---|
| .length | Returns the length of the array |
| .join | Combines elements of the array into a string; the separator can be customized (usually a space) |
| .indexOf | Returns the index of the first occurrence of a specified value in the array |
| .map | Returns a new array containing the results of running a specified function on each element of the original array |
| .filter | Returns a new array containing elements from the original array that match specified conditions |
| .includes | Returns true or false if the array contains the value passed to the method |
| .reduce | Reduces the array to a single value by running a function on each value (from left to right) |
| .concat | Merges 2 or more arrays |
# Asynchronous JavaScript
This document explains how to write asynchronous JavaScript code.
JavaScript Promises
JavaScript Promises help manage asynchronous workflows that are difficult to handle with callbacks. PagePlug provides native support for JavaScript. Promises make asynchronous operations easier, and PagePlug's framework functions, such as showAlert(), showModal(), storeValue(), and others, all return Promises, making the implementation of asynchronous workflows easier and more readable.
# Callbacks vs Promises
To understand the difference between callback and promise implementations, consider an example that executes three API queries sequentially and displays a message after all APIs have successfully completed, for instance:
// Using Callbacks
{{
    MockApi.run(() => {
        MockApi1.run(() => {
            MockApi2.run(() => {
                showAlert('done')
                })
        })
    })
}}
Using promises for the same example makes the implementation more manageable and readable.
{{
    MockApi.run()
        .then(() => MockApi1.run())
        .then(() => MockApi2.run())
        .then(() => showAlert('done'))
 }}
# Promise Methods
JavaScript Promises have several built-in methods.
tips
When passing a function to .then() or .catch(), remember to pass it as a callback function, as shown below:
Incorrect Method
{{
 (function() {
   MockApi.run().then(showAlert(`Success`))
  })()
}}
Correct Method
{{
  (function() {
     return MockApi.run().then(() => showAlert(`Success`))
   })()
}}
Method 1: Promise.any()
Promise.any() takes an iterable of Promises as input and returns a single Promise. It returns a Promise that resolves with the value of the first fulfilled Promise. If you only want one action/Promise to complete for further execution, you can use the Promise.any() method.
{{
      (function(){

        return Promise.any([
              MockApi.run({ name: 1 }), // if name:1 finished early
              MockApi.run({ name: 2 })
        ]).then((res) => {
          showAlert(`Winner: ${res.args.name}`) // Alert Message shown as "Winner: 1"
        });
      })()
}}
In this example:
The function calls multiple API queries, passing parameters to each API call. The returned Promises are passed to
Promise.any().When any API call completes first and returns a fulfilled Promise, an alert message is displayed. The message contains the parameter sent to the API that completed execution and returned a Promise first among the API calls.
Method 2: Promise.race()
It waits for the first settled Promise (fulfilled or rejected) to get the result. You can use Promise.race() when you only need one action/promise to complete execution.
{{
        (function(){
            return  Promise.race([
                    MockApi.run({ name: 1 }),
                    MockApi.run({ name: 2 })
            ]).then((res) => {
                showAlert(`Winner: ${res.args.name}`)
            });
        })()
}}
In the example:
The function calls multiple API queries, passing parameters to each API call.
The returned Promises are passed to
Promise.race().When any API call completes first and returns a fulfilled Promise, an alert message is displayed. The message contains the parameter sent to the API that completed and returned a Promise first among the API calls.
Method 3: Promise.all
It takes an array of Promises (technically any iterable, but usually an array) and returns a new Promise. The result array of the Promises becomes the result of the new Promise. If one of the promises fails (rejects), the new Promise immediately rejects with the same error. You can use Promise.all() when you want all operations to complete successfully.
{{
    (function(){
        let employeeNames = ["Employee 1","Employee 2"];
        // Start a bunch of calls running in parallel and store returned promise
        const calls = employeeNames.map(employeeName => MockApi.run({ name: employeeName }));

        // Wait for all to finish (or any to reject).
        return Promise.all(calls)
                .then(() => showAlert('Promise.all - All successful'))
                .catch(() => showAlert('Promise.all - Something went wrong'))
                .finally(() => showAlert('Promise.all - finished'))
    })()
}}
In the example:
The function runs the API using employee names passed as parameters.
The
callsarray stores the returned Promise for each API call.An alert message is displayed based on the success or failure case in
Promise.all().
Method 4: Promise.allSettled()
It waits for all promises to settle, regardless of the outcome (resolved or rejected). You can use Promise.allSettled() when you want all operations to complete first.
{{
  (function(){
    let employeeNames = ["Employee 1","Employee 2"];
    // Start a bunch of calls running in parallel and store returned promise
    const calls = employeeNames.map(employeeName => MockApi.run({ name: employeeName }));

    // Wait for all to resolve / reject.
    return Promise.allSettled(calls)
          .then(() => showAlert('Promise.allSettled - All successful'))
          .catch(() => showAlert('Promise.allSettled - Something went wrong'))
          .finally(() => showAlert('Promise.allSettled - finished'))
  })()
}}
In the example:
The function runs the API using employee names passed as parameters.
The
callsarray stores the returned Promise for each API call.An alert message is displayed based on the success or failure case in
Promise.allSettled().
# General Guidelines
Most action triggers in the project return Promises, so you can attach a
.then()orawaitto wait for the operation before proceeding.All triggers are wrapped in Promises, so any missed errors will result in uncaught Promise errors.
Attach
.then()to the returned promise, as shown below:
{{
  (function() {
        // the .then only runs if a promise is returned
        return MockApi.run()
            .then(() => showAlert('success'))
    })()
}}
- Parameters are no longer passed in the arguments of
.then()afteraction.run(). Only the response is passed, as shown:
Place the code below within {{}} to use it.
(function() {
    const params = { name: "PagePlug" }
    return MockApi.run(params).then((response) => {
            showAlert(`${response.length} users found in `${params.name}`)
        })
})()